Watercolor Bunny Tutorial for Procreate
Paint a soft watercolor bunny in Procreate with free files and a wash-by-wash Twotap walkthrough.
Download the free files
Procreate-ready, yours to keep
This free tutorial builds a watercolor bunny in Procreate with soft edges and simple shapes. Download the free files first, then follow the video so your washes stay aligned with the demo.
Keep layers separated for ears, body, and background mist. For matching brushes, see the Ultimate Watercolor Brush Set.
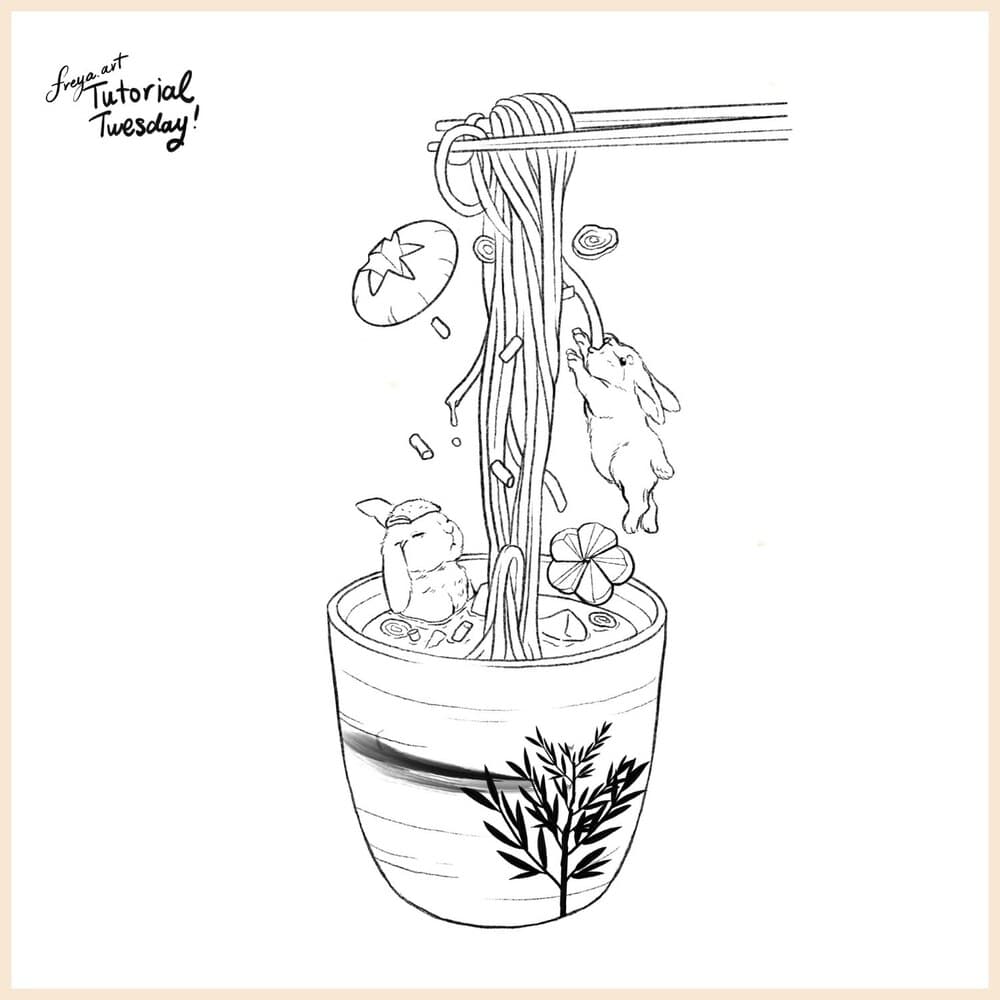
Start by importing the sketch file into Procreate. It's already set to the right size and 300 DPI. Trace the sketch with the Peppermint brush in a brown color.
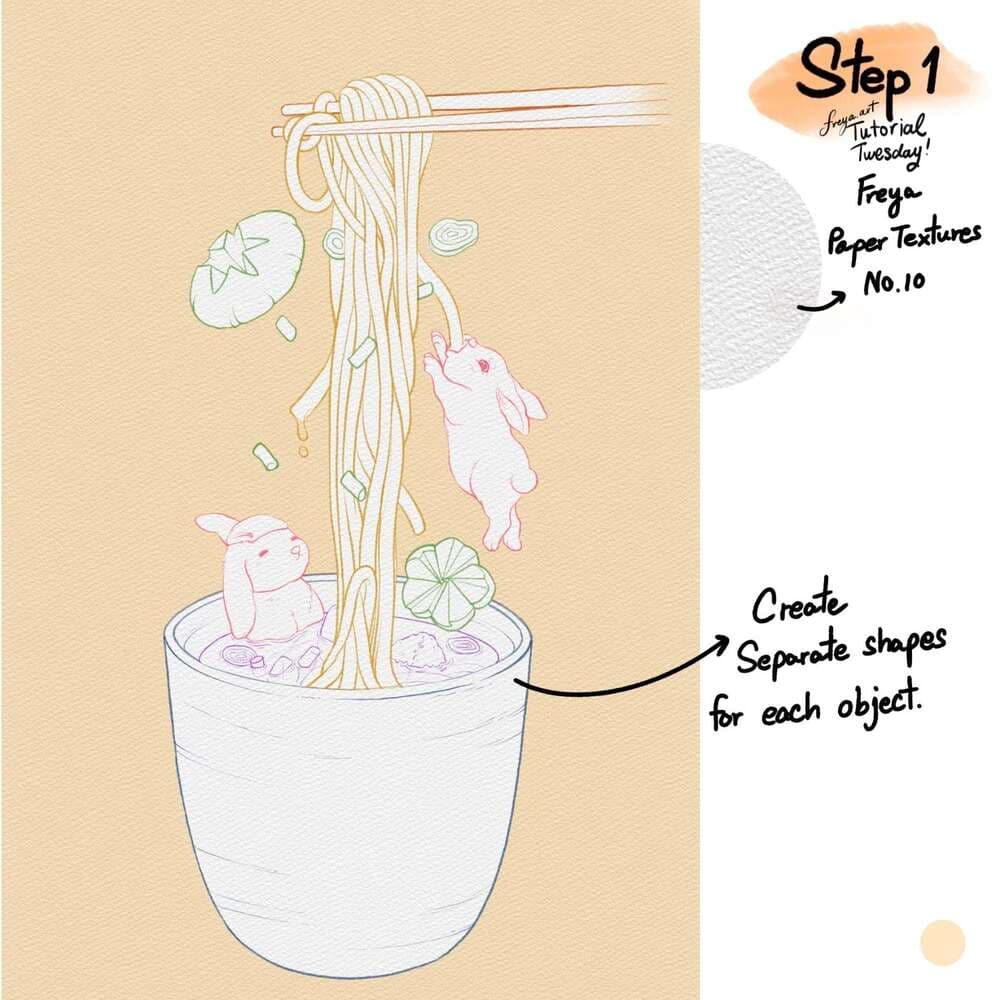
Step 1: Add a layer of texture using the Twotap Paper Texture Brush No. 10 in a light grey color. Set the layer to Linear Burn mode (LB) and adjust the opacity. Move this on top of all the layers. Make sure all succeeding layers are under this texture layer, so that the texture will apply to the entire canvas.
Add a new layer for each object in the composition and using the Technical pen, create shapes and fill them with white color. So one layer for the scallions, one layer for the noodles, one layer for the bowl, etc. It would be a good idea to rename each layer. Ex. Bunny Shape, Scallion Shape, Mushroom Shape, etc.
Change the background color layer to a light brown color so that the white shapes are clearly visible. Check if you missed any spots to fill.
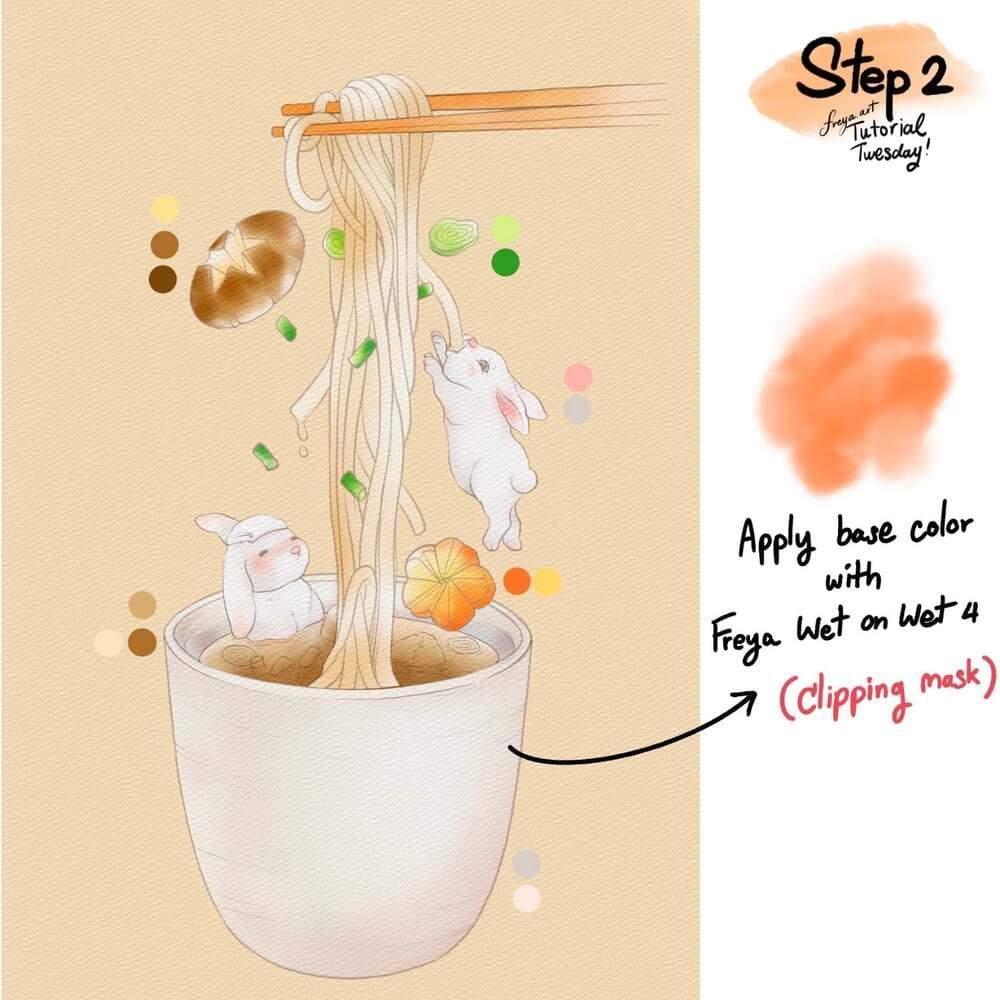
Step 2: Now, add a clipping mask layer on top of each element and start applying base color using Twotap Wet on Wet No.4 brush. Use different shades to map out the areas for highlights and shadows later. Rename your clipped layers so that they are easier to spot. Ex. Bunny Base, Scallion Base, Mushroom Base, etc.
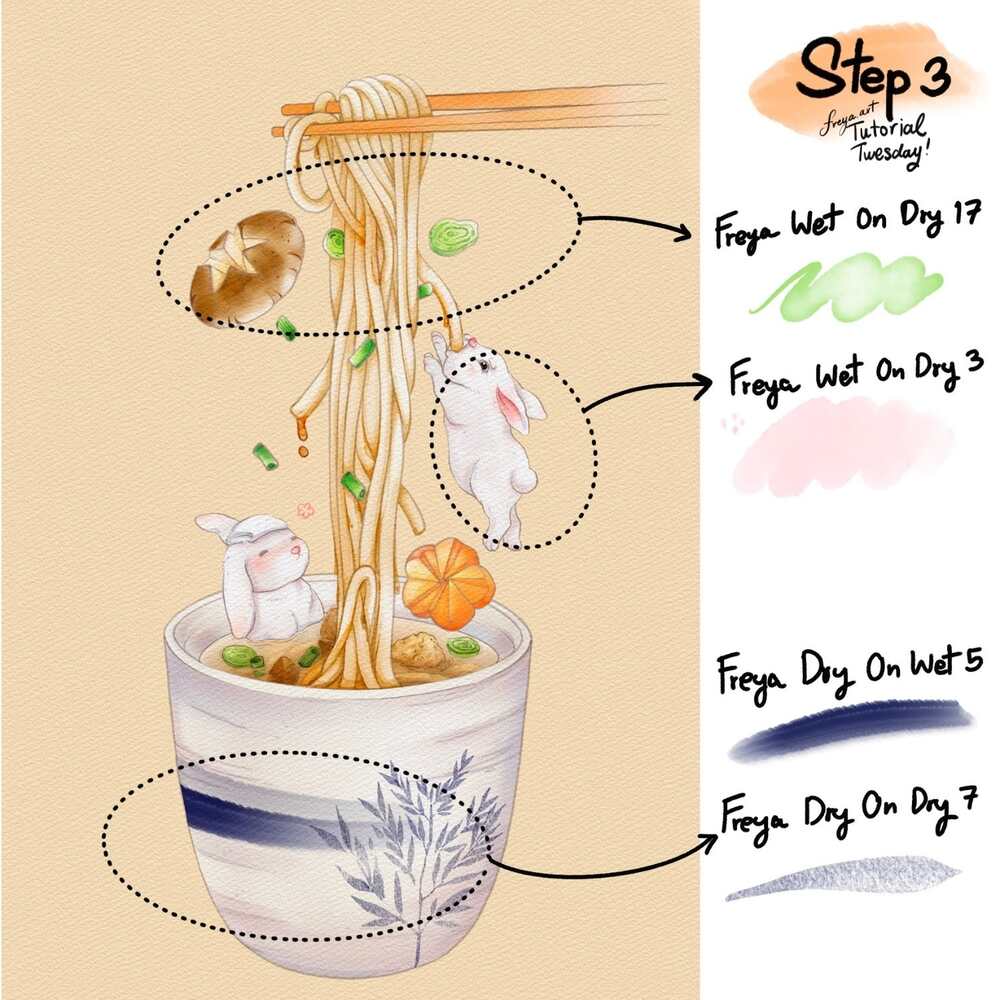
Step 3: Add another clipping mask layer for each element for the detailing. Use Twotap Wet on Dry No. 17 for the mushroom, scallions, and noodles. Use Twotap Wet on Dry No. 3 to add details for the bunnies. Rename the new clipped layers appropriately. Ex. Noodle Details, Mushroom Details, etc.
Draw the design of the bowl using Twotap Dry on Wet no. 5 and Twotap Dry on Dry No. 7. You can change this design if you like. You can be creative about it. Rename the clipped layer too. Ex. Bowl design.
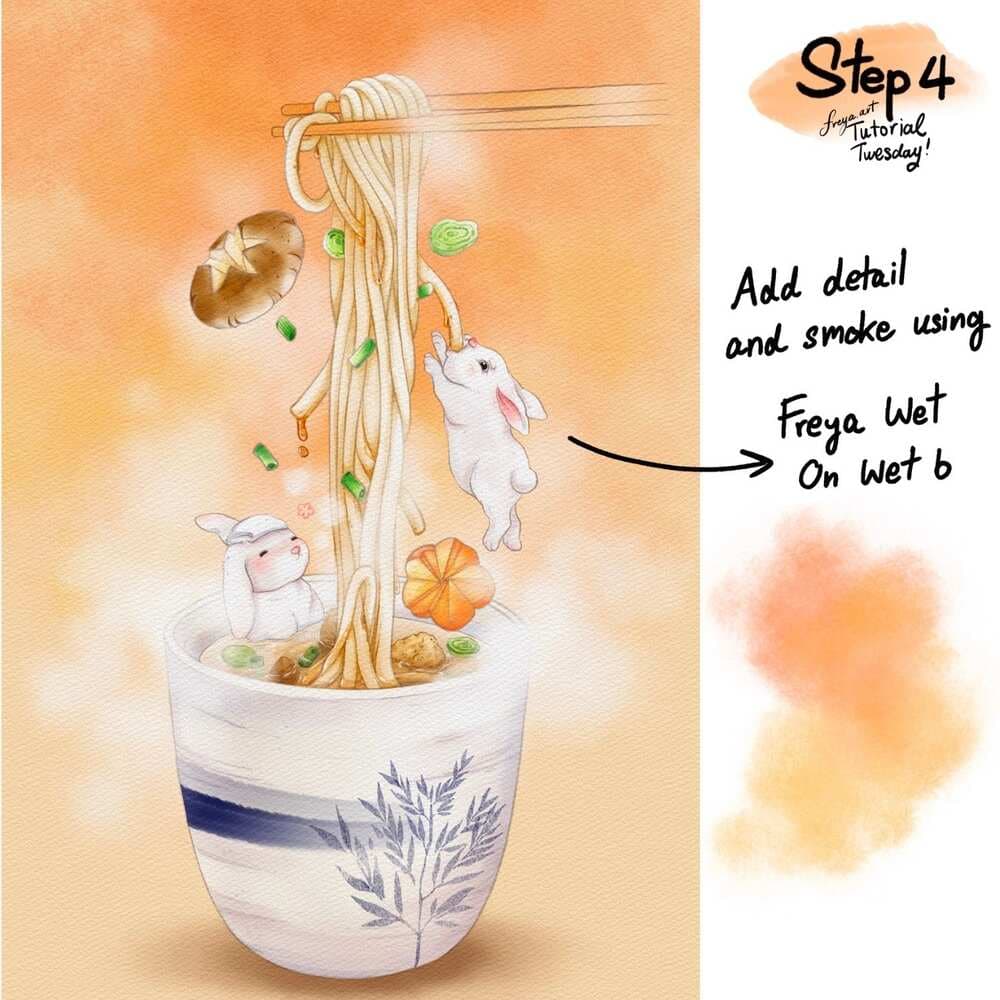
Step 4: For the finishing touches, add another layer on top and add steam using Twotap Wet on Wet 6 around the noodles and the bowl.
There you have it! Congratulations! You've just completed this cute Soba and Bunny Watercolor Tutorial using my Ultimate Watercolor Brush Set! Please don't forget to tag Twotap if you post it. We would love to see your version.
Your bunny is ready to share. Try a second version with a new palette, or continue with more watercolor practice in Twotap’s courses.
Grab the Ultimate Watercolor Brush Set for more of this look, or continue learning in Twotap courses.


