Masterclass for Procreate
Make art you’re proud to share. Learn the choices behind it.
- 45h+video teaching
- 2included courses
- Own pacepause and replay
- Lifetimeaccess
One-time purchase · Lifetime course access · 30-day money-back
Follow Freya Kotchakorn through complete Procreate projects and learn how colour, light and layers work together. See the decisions behind each painting, practise at your own pace and build the skills to develop your own ideas.
Why Your Hard Work Isn't Showing Up on the Canvas
You know where the tools are. You've followed along step by step. But something's still off: your shadows turn muddy, your colors feel flat, and everything looks overly smooth.
Learning Procreate alone won't fix that. The gap isn't more brushes or flashy effects. It's understanding why you place a shadow, pick a color, or keep a stroke.
In this course, we show you those decisions. For example, why apple shadows should never be gray, and what to use instead. One tip. About 30 seconds to learn. It changes how your paintings read.
What Actually Makes This Different
Compared with most tutorials you've tried:
Other tutorials skip crucial steps. We don't.
Start with zero experience. We begin with the basics: which tools do what, how layers actually work, why your strokes look different from ours. You build skills through real projects, not theory you'll forget.
See every stage of the painting
Watch the brush strokes, colour choices and layer changes. Pause to practise a step on your own canvas and replay it when you want another look.
Yours to keep. No disappearing library.
Pay once, keep everything. 400+ brushes, all lessons, and future updates we add to the course. No monthly subscription. No surprise charges.
Finish work you're willing to show
Stop hiding your canvas. Create pieces good enough to post, print, gift, or sell. The kind of art that makes people ask where you learned.
You'll learn by doing
A sequence to work through at your own pace. Pause to paint along and revisit any step with lifetime access.

Your first guided painting
Follow a painting from its first strokes through to the finished piece.

Bring your skills together
Explore different painting techniques and compare the choices behind them.

Set up your brushes
Download the course brushes and find the tools used in the first lesson.

Build colour and form
Practise colour, light and layers across the guided projects.

Keep exploring at your pace
Revisit projects and use what you have practised in your own ideas.
Set up your brushes
Download the course brushes and find the tools used in the first lesson.
Your first guided painting
Follow a painting from its first strokes through to the finished piece.
Build colour and form
Practise colour, light and layers across the guided projects.
Bring your skills together
Explore different painting techniques and compare the choices behind them.
Keep exploring at your pace
Revisit projects and use what you have practised in your own ideas.
What this is really about
The projects are beautiful. But the reason 80,000 Twotap students stay isn't only the art. It's what a steady creative practice does for the rest of the week.
Turn the quiet house after the kids are asleep into a creative ritual that's entirely yours. No cleanup. No setup. Just you, your iPad, and a short stretch of focused drawing.
Make art worth framing for your home, gifting to family, or sharing as a skill with grandkids. Not only practice pieces. Finished work.
When the day gets heavy, you have something that brings you back to yourself. A calm, creative outlet that's completely yours.
When grandkids visit, you can be the one teaching them. When they ask how you made that, you'll know how to explain it.
When people ask about your hobbies, you can say you're an artist. Not "I'm learning." Not "I'm trying." You make things.
That's what I'm really offering: a clear path to become the artist you've wanted to be.
— Freya
Your mentor
For over 15 years I've been doing illustrations for brands like Louis Vuitton, Tiffany & Co. and Sephora
I'm Freya Kotchakorn. My digital illustrations have been used by Louis Vuitton, Tiffany & Co., and Sephora, and I've spoken at Apple Store events to teach Procreate techniques.
Yet my favorite work isn't for big brands, it's helping complete beginners surprise themselves with what they can create. My favorite feedback is when they tell me: "It felt very geared towards beginners wanting to learn Procreate... it felt like it was attainable even for someone like me who has very little experience."
That's exactly what I designed this course to do. Make the "impossible" feel completely achievable.


Speaking at an Apple Store event about Procreate techniques
From following tutorials to working on your own
Whether you're new or already drawing, this course moves you from "I need a tutorial for this" to "I know how to figure this out."
See light like an artist: understand how light, shadow, and form work. Not just where to click, but why.
Work like a professional: layer structure, blend modes, and editing techniques we use for client work.
Find your style: explore 4 completely different illustration styles and discover which one feels like yours.
Finish real art: work through the course projects and build a collection of finished guided paintings.
Think independently: learn the why behind every decision so you rely less on the next tutorial.
Why digital art fits real life
When we painted and illustrated by hand, we always needed a dedicated workspace large enough to take up half a room.
With Procreate, all you need is an iPad and an Apple Pencil. A set of decent brushes, watercolors, and quality paper can run $200 or more. Add a high-detail scanner and a computer with software for cutting your work, and you've spent well over $1000 before you even start painting.
When you're done for the evening, close your iPad. No cleanup. No drying time. Pick up right where you left off tomorrow.

Included assets used in commercial illustration work
Brushes, layers, and resources we use on commercial projects for brands like Louis Vuitton, Tiffany & Co, and Sephora. Yours to keep with lifetime access.
Free Bonus #1
Foundations Brush Set
70+ custom brushes designed to behave like traditional oils, charcoals, and watercolors. These are the tools we use on projects for Louis Vuitton and Tiffany & Co.
Value: $49 Free

Free Bonus #2
Art Grade Swatches
15+ palettes refined across 15 years of commercial work so your colors stay cleaner and less muddy or plastic-looking.
Value: $39 Free

Free Bonus #3
All source files
Open our finished files. See every layer, blend mode, and stroke so you can study how a piece is built.
Value: $36 Free

Free Bonus #4
Photo manipulation course
2.5 hours on merging photography and digital art into clean, finished compositions.
Value: $39 Free

Free Bonus #5
Templates
Guided outlines so you can focus on light, shadow, and texture instead of guessing the sketch.
Value: $37 Free

Free Bonus #6
Style assessment guide
A short guide to notice your natural preferences so you stop only copying others and start making work that feels like yours.
Value: $9 Free

Free Bonus #7
Private Facebook group
Lifetime access to the Twotap private Facebook group. Get feedback from our team and peers so you don't have to solve every problem alone.
Value: $49 Free

Free Bonus #8
Lifetime Updates
As Procreate changes, we update the Masterclass. New modules and brushes we add stay included for you.
Value: $99 Free

The full curriculum
45.7 hours of step-by-step training in 14 modules. Each module builds on the last, from basic tools to portfolio-ready work.
Get set up and comfortable before you start drawing.
 1 Introduction2:02
- How to use the platform
- Access to the private Facebook group
Learn the essentials so you know where everything is.
 4. Navigating the Gallery, Your Project Hub in Procreate2:02
 5. Bringing In and Saving Out, How to Import & Export Your Work5:31
 6. Setting Up Your Canvas, The First Step to Any Artwork2:58
 7. Understanding the Workspace, Tools, Menus & Where to Find Everything2:38
 8. Layer Organization - How to Tidy Up Layers and Avoid Confusion3:57
 9. Mastering Basic Layer Actions, Rename, Fill Layer, Select, and Clear1:59
 10. Drawing Perfect Shapes With QuickShape2:08
 11. How to Blend Like a Pro With the Smudge Tool3:00
 12. Using the Eraser, Clean Up Your Artwork with Precision1:10
 13. Organize Your Artwork, How to Group and Merge Layers3:15
 14. The Color Panel, Modes, Tips & Palette Building5:15
 15. Move, Resize, and Rotate With the Transform Tool3:03
 16. Isolate and Edit With the Selection Tool5:35
 17. ✍️ Practice Perfect Shapes, QuickShape Exercise49:13
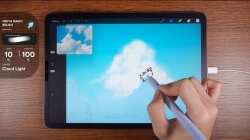 18. ✍️ Blend and Clean, Smudge & Eraser Practice37:06
 19. ✍️ Color Like a Pro, Practice 4 Easy Ways to Fill Color37:50
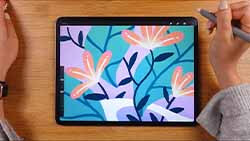 20. ✍️ Masking Made Easy, Practice Alpha Lock, Layer Mask & Clipping Mask17:04
 21. ✍️ Learn to Pick Colors from Photos, A Practical Palette Exercise39:06
Build skills through hands-on projects.
 22. ✍️ 5 Fun Ways to Recolor Your Artwork12:18
 23. ✍️ Create a Simple Pattern Using Transform & Selection Tools5:06
 24. ✍️ Create a Collage Look Using Transform & Selection Tools23:58
 25. ✍️ Create 3D-Looking Lettering With the Smudge Tool18:40
 26. ✍️ Create Your Own Solid Stamp Brushes (Landscape Theme)47:00
 27. ✍️ Create a Playful Landscape, Easy Step-by-Step Exercise1:15:12
 28. ✍️ Create a Rubber Stamp Brush Using Layer Mask32:49
 29. ✍️ Create a Repeating Leaf Pattern From Scratch36:22
 30. ✍️ Photo Manipulation, Create a Surreal Floating Woman Scene2:24:22
 31. ✍️ Learn Reference Layers & Color Fill, Practice Exercise3:56
Add polish with blend modes, effects, and color edits.
 32. Light, Shadow & Texture, Exploring Blend Modes in Procreate3:03
 33. Invert Colors on a Layer, Create Cool Effects With One Tap2:09
 34. Fade or Bold, Learn to Control Opacity for Better Effects1:39
 35. How to Blur in Procreate, Add Depth & Atmosphere2:57
 36. Make it Textured, How to Use Noise in Procreate2:48
 37. Make Your Details Pop, How to Use the Sharpen Tool1:35
 38. Swirl & Flow, Learn Liquify by Making Pretty Marble Art4:56
 39. How to Use Clone Tool, Duplicate Textures & Fix Flaws2:07
 40. Get the Perfect Look, Color Editing Basics with HSB, Balance & Curves4:14
 41. Visual Effects: Gradient Map, Bloom, Glitch & More7:14
 42. ✍️ Practice 4 Easy Ways to Create Beautiful Gradients9:42
 43. ✍️ Create a Shiny Iridescent Background6:17
Work faster and keep your files organized.
 44. Bringing in Images, Insert Files or Photos to Work With1:34
 45. Draw with References, Add Private Photos & Canvas View1:50
 46. Use Canvas Reference for Face Painting and Overlay Art3:06
 47. Move Art Between Canvases, Cut, Copy, Paste & Copy Canvas2:05
 48. Adjust Canvas Size, Trim or Expand Your Workspace3:03
 49. Make Comics, Journals, or Storyboards With Page Assist3:08
 50. Bring Your Art to Life, Getting Started With Animation Assist6:27
 51. Understanding Onion Skin Color, See Your Animation Frames Clearly1:50
 52. Edit Drawing Guide for Accurate Grids & Perspective3:28
 53. Make Perfect Reflections With the Symmetry Drawing Guide3:40
 54. Get Your Art Out of Procreate, Share, Save, and Send2:30
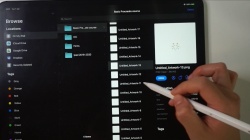 55. Export Your Layers, Turn Them Into Images, PSDs, or Animations1:45
 56. Record Your Drawing Process, Procreate Timelapse & iPad Screen Recording2:56
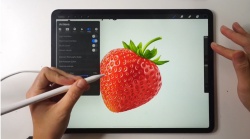 57. Procreate General Settings, Customize Your Interface & Tools2:50
 58. Gesture Controls Explained, Set Up Your Favorite Shortcuts8:43
 59. Helpful Settings and Features You Might’ve Missed, Language & More4:46
 60. ✍️ Make a Moving Image With Symmetry + Animation Tools7:11
 61. ✍️ Animate a Blooming Bouquet With Color-Changing Brushes1:11:50
Core skills that improve everything you paint.
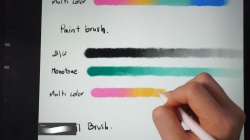 62. ✍️ Shading Basics, Practice Brush Pressure & Color Transitions12:09
 63. ✍️ Realism With Simple Shapes, Light, Form & Shadow25:09
 64. ✍️ Painting an Apple, Build Realism With Texture and Depth37:30
 65. ✍️ Creating a Realistic Daisy, Speed Up Your Work With Symmetry38:29
Catch up on the latest Procreate update.
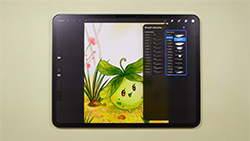 66. Procreate 5.4 Update20:01
Text, AR, and animation extras in Procreate.
 Bonus 1.1: Add and Edit Text in Procreate6:16
 Bonus 1.2: ✍️ Sketch Your AR Pop-Up Lettering, “Hello, Hola, Hallo”22:19
 Bonus 1.3: ✍️ Create the Final Lettering for Your AR Pop-Up Design1:08:20
 Bonus 1.4: ✍️ Create Animation Layers for Your AR Pop-Up Lettering50:46
 Bonus 1.5: ✍️ Bring Your Lettering to Life With Pop-Up AR in Procreate4:27
Shape brushes so they match how you like to draw.
 Bonus 2.1: Get to Know Procreate’s Brushes, From Sketching to Painting3:05
 Bonus 2.2: Create a Personalized Brush Set for Your Workflow3:36
 Bonus 2.3: Make Your Brushes Flow With Pressure and Smoothing6:11
 Bonus 2.4: Make Your Strokes Feel Natural, Set Up Pressure Sensitivity4:07
 Bonus 2.5: How to Use Brush Stabilization for Clean, Confident Strokes3:38
 Bonus 2.6: Dynamic Brush Scaling, Keep Your Brush Consistent1:59
 Bonus 2.7: Save Your Favorite Brush Sizes for Quick Access2:50
 Bonus 2.8: Activate Brush Cursor for Better Accuracy0:37
 Bonus 2.9: Change the Look of Your Brush Cursor in Procreate3:11
 Bonus 2.10: Use Hover to Test Brush Size, Shape & Angle Before Drawing3:28
 Bonus 2.11: Adjust Brush Size & Opacity With Hand Gestures in Procreate3:04
 Bonus 2.12: Create Your Own Procreate Brush From Scratch4:32
 Bonus 2.13: Stroke Path Settings, Control Flow, Spacing & Smoothness2:09
 Bonus 2.14: Taper Settings, Control Stroke Start, End & Flow1:57
 Bonus 2.15: Shape Settings, Define the Look and Flow of Your Brush Tip2:27
 Bonus 2.16: Grain Settings, Add Texture and Flow to Your Brush Strokes4:43
 Bonus 2.17: Rendering Settings, Control How Your Brush Reacts2:28
 Bonus 2.18: Wet Mix Settings, Control How Your Brush Blends Like Paint3:45
 Bonus 2.19: Color Dynamics Settings, Add Hue, Saturation & Randomness to Your Strokes4:00
 Bonus 2.20: Dynamics Settings, Control Speed, Jitter, and Motion in Your Strokes1:07
 Bonus 2.21: Apple Pencil Settings, Control Pressure, Tilt & Brush Response3:14
 Bonus 2.22: Properties Settings, Set Brush Limits, Size,2:19
 Bonus 2.23: Materials Settings, Control the Feel of Your Brush on 3D Surfaces6:44
 Bonus 2.24: About This Brush, Add Info, Sign Your Brush & Lock Settings1:28
Paint on 3D models with current Procreate features.
 Bonus 3.1: How to Import a 3D Model into Procreate3:37
 Bonus 3.2: Understanding 3D Mode and 2D View, Paint From All Angles1:35
 Bonus 3.3: Set the Scene, Customize 3D Lighting and Environment3:25
 Bonus 3.4: See Your 3D Art in the Real World With AR View1:25
 Bonus 3.5: Create a 3D Art Showcase Video in Procreate1:52
Download your course files and join the private Facebook community to share work and ask questions.
 Quick welcome & course overview6:40
- All your essential files ready to download
- VIP access to our supportive Facebook group
Use a short quiz and guided prompts to notice which approaches feel natural, without copying someone else's look.
 Find Your Style8:36
- Style Quiz
Learn how to choose colors, then try four different techniques to see what clicks for you.
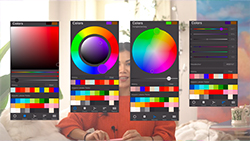 Color Theory Made Simple12:09
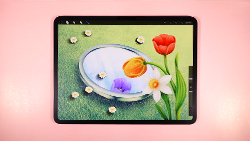 Trendy Flower Prints2:41:09
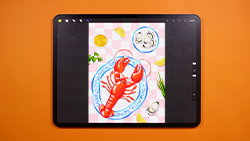 Rich Lobster Platter2:44:48
 Shimmery Cocktail6:14:51
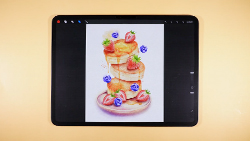 Watercolor Pancake & Berries3:40:05
Practice placing elements so a piece feels balanced, then bring skills together in four projects.
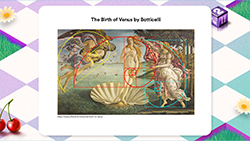 Where to Put Things10:53
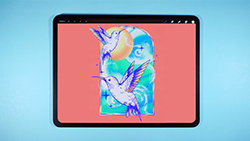 Inking Hummingbird57:00
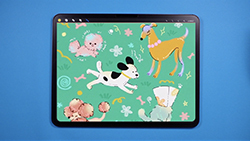 Adorable Dog Patterns1:31:25
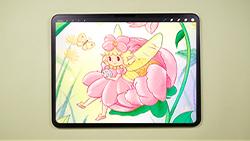 Children’s Book Peony Fairy4:21:35
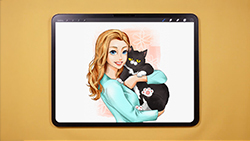 Fun Comic Portraits3:13:40
Take two lessons from this course, free
Real lessons from the course, not a trailer. They open in your Twotap library and stay yours.
 49 min
Halftone Tulip
The complete lesson, not a preview
 1h 32m
Porcelain Plate Oil Painting
The complete lesson, not a preview
2h 21m of teaching from the $149 course — free
- Yours to keep, forever
- No card, no trial
- Opens in your library

30-day full refund
If you follow the process and it isn't the right fit, we offer a 30-day refund. No questions asked.

 Lifetime access and updates
- Complete guided painting projects
- A custom brush set with brushes for every medium
- 30-day money back guarantee
Masterclass for Procreate
Complete Foundation + Style Discovery, 45+ hours of video
One-time purchase · Lifetime course access
 Secure payment


*Prices in USD. One-time purchase with lifetime course access.
FAQs
Common questions about this course and other Twotap courses.
Masterclass combines Complete Foundation, which teaches Procreate fundamentals, with Style Discovery, which explores painting techniques through projects in different art styles. Both courses are included in this one-time purchase.
No. We start from the very beginning and never assume you've drawn before. If you can hold an Apple Pencil and have Procreate on your iPad, you can follow along.
Any iPad from 2018 onward runs Procreate well. You don't need the newest model, a solid Apple Pencil, compatible iPad is enough.
Yes, Procreate works best with a pressure-sensitive Apple Pencil (1st Gen, 2nd Gen, or Pro). The basic USB-C Pencil is less ideal for line weight and opacity.
The lessons are self-paced. Allow time to pause and draw along, and revisit techniques as you work through the projects. Lifetime access lets you take the time you need.
You can watch on any device with a browser, but you'll want your iPad open to draw along. Many students watch a step, pause, then paint, or use a second screen for the video.
You're not alone. Join the private Twotap community on Facebook to ask questions and share progress, students and our team are active there. You can also email support@twotap.art anytime.
No. This is a one-time purchase with lifetime access. Buy once, revisit forever, including updates we add to the course.
Yes. We offer a 30-day money-back guarantee. If it isn't the right fit, reach out to support@twotap.art within 30 days and we'll take care of a full refund.
Still have questions?
We're happy to help, whether it's a tech hiccup, a sizing question, or you're just not sure which Twotap course fits. Reach out anytime.
Contact