Fur Lettering Tutorial for Procreate
Create fluffy fur lettering in Procreate with free files and a guided video. A playful demo for Twotap’s Fur Brush Set.
Download the free files
Procreate-ready, yours to keep
Fur lettering is a high-delight Procreate project: readable letters first, then fuzzy texture on top. This free tutorial includes files so you can follow the build without guessing.
Paint along with the video. For the brushes made for this look, open the Fur Brush Set.
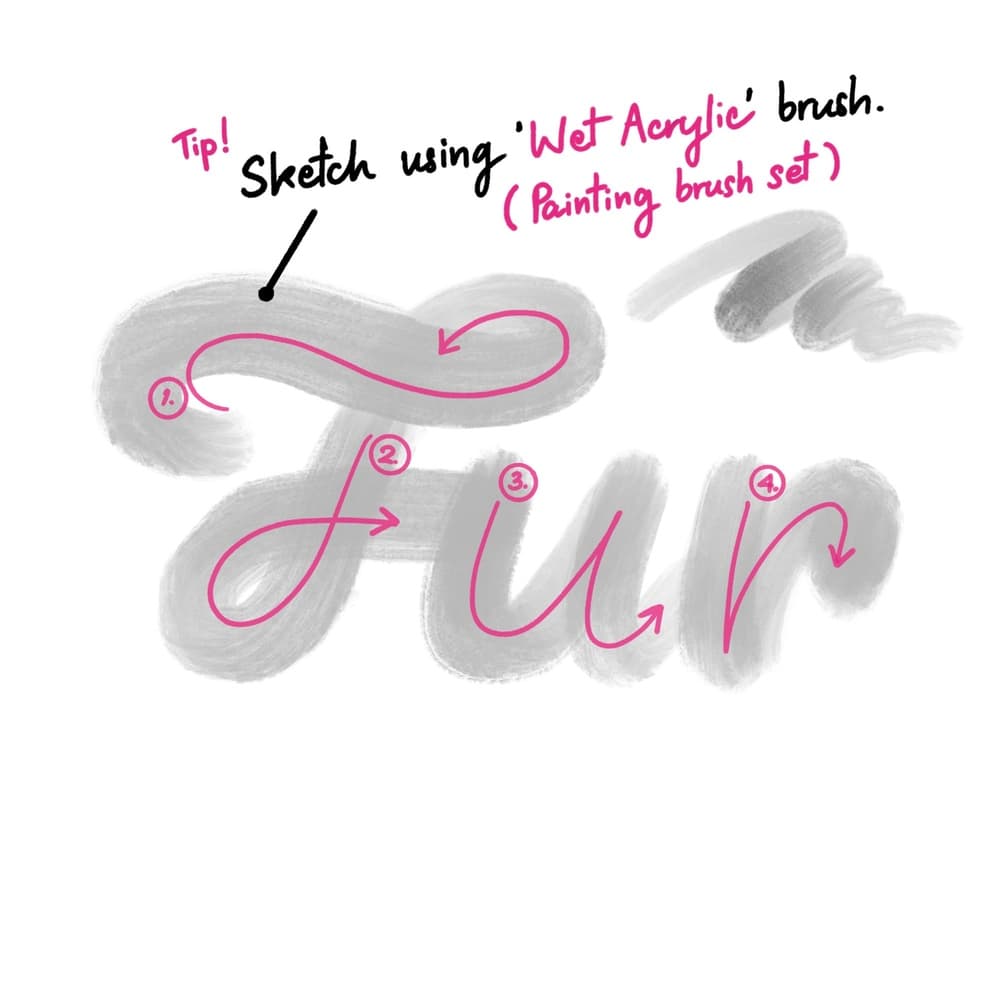
Let’s start by creating a 3000 x 3000 pixel canvas. You can import the lettering guide, or choose to do the lettering from scratch. Use the default Wet Acrylic brush from the Painting Brush Set. Then draw the letter shapes per section.
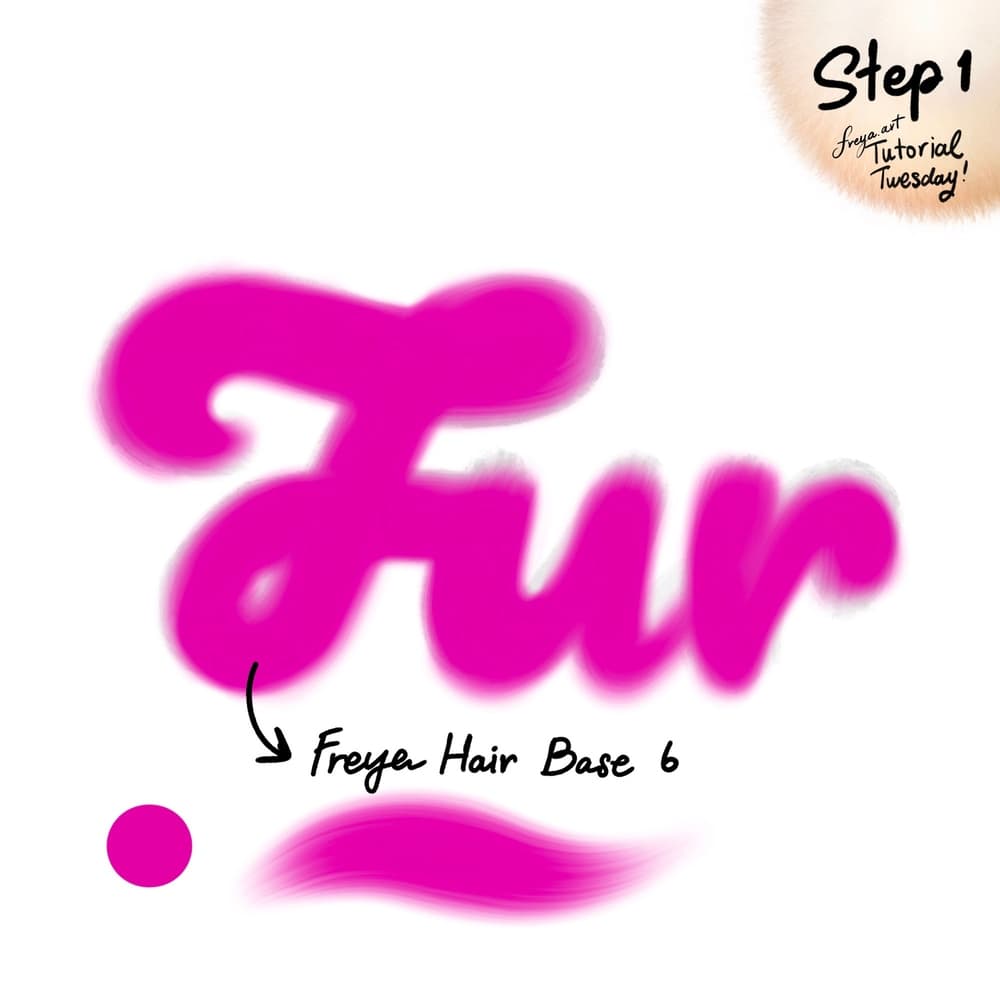
Step 1: Add another layer on top of the guide. Using the Twotap Hair Base No. 6 brush, draw the base shape using a bright pink color.
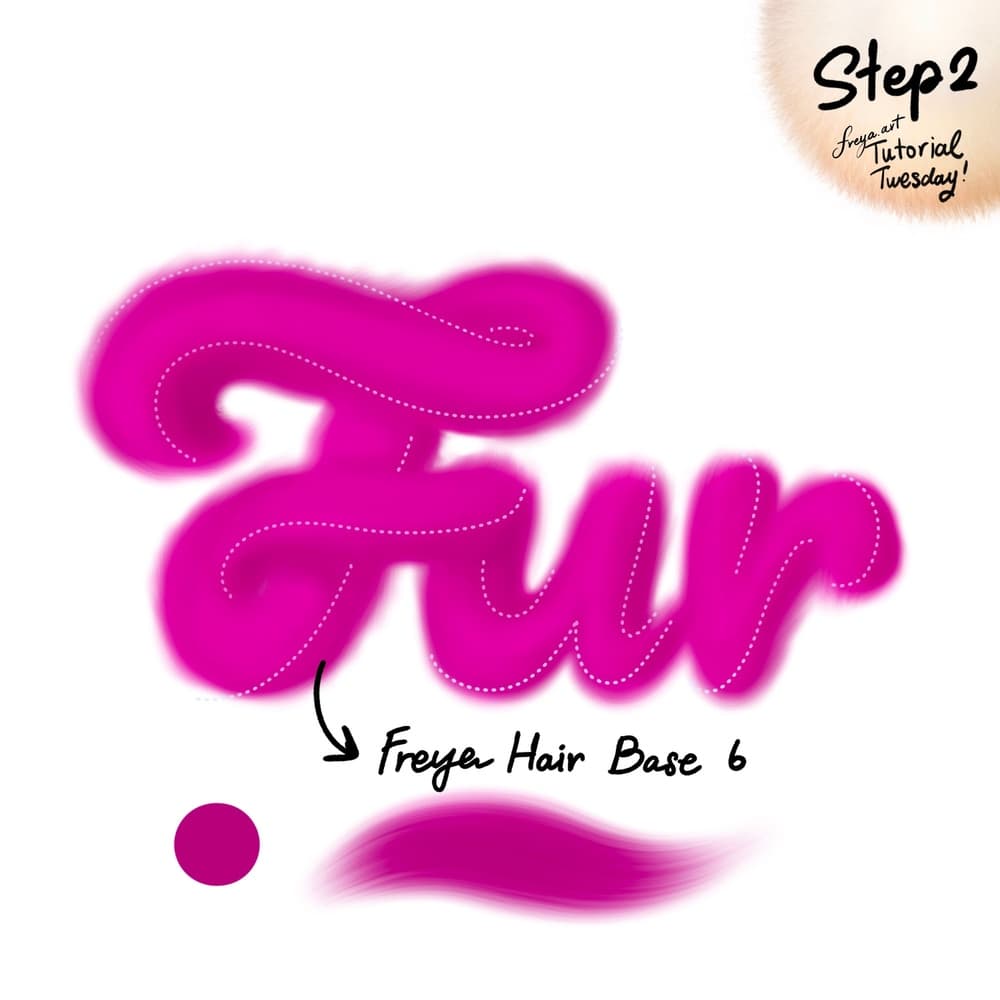
Step 2: Add another layer and set it as a clipping mask. we’ve added dotted lines to indicate where to draw next. Use a darker pink color and the same brush to add some shadows to our lettering. This will help add shape and depth.
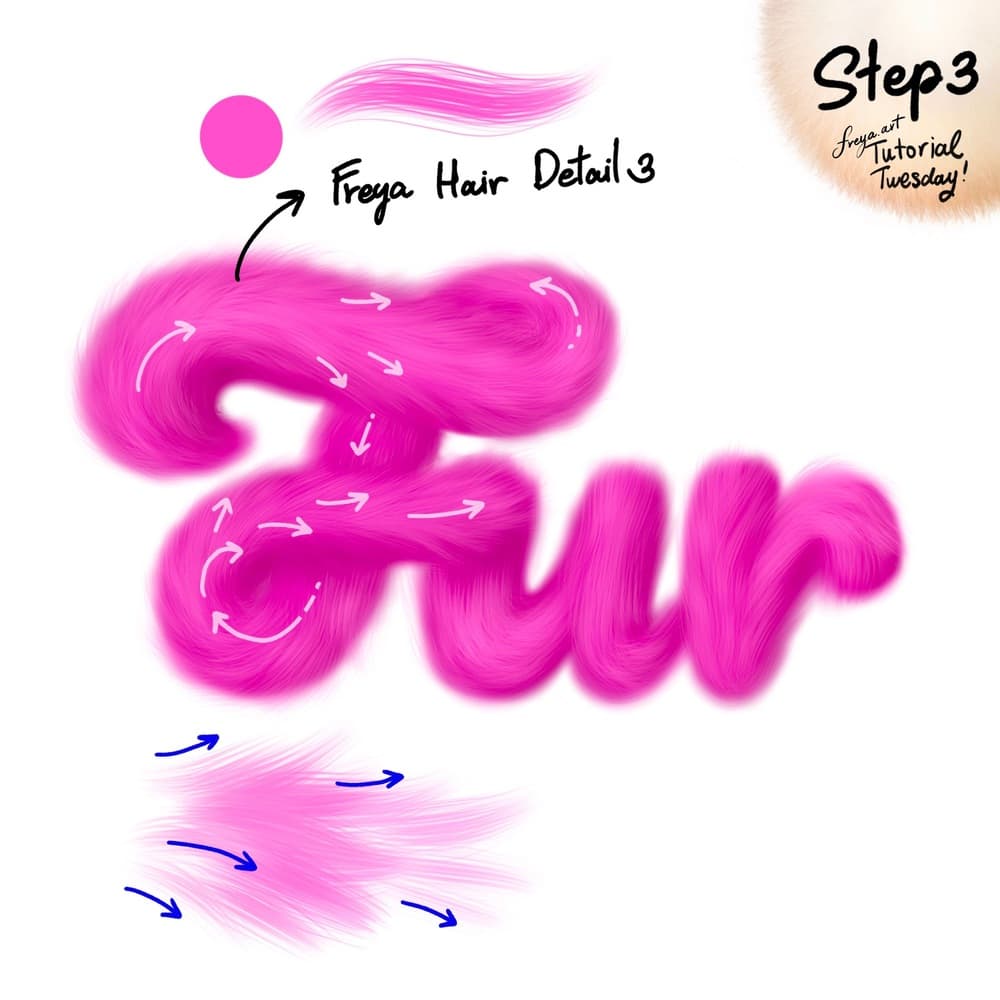
Step 3: Add a new layer. This time you don’t need to clip it. Use the Twotap Hair Detail No. 3 brush in a lighter pink color, to draw the fur texture in an outward motion.
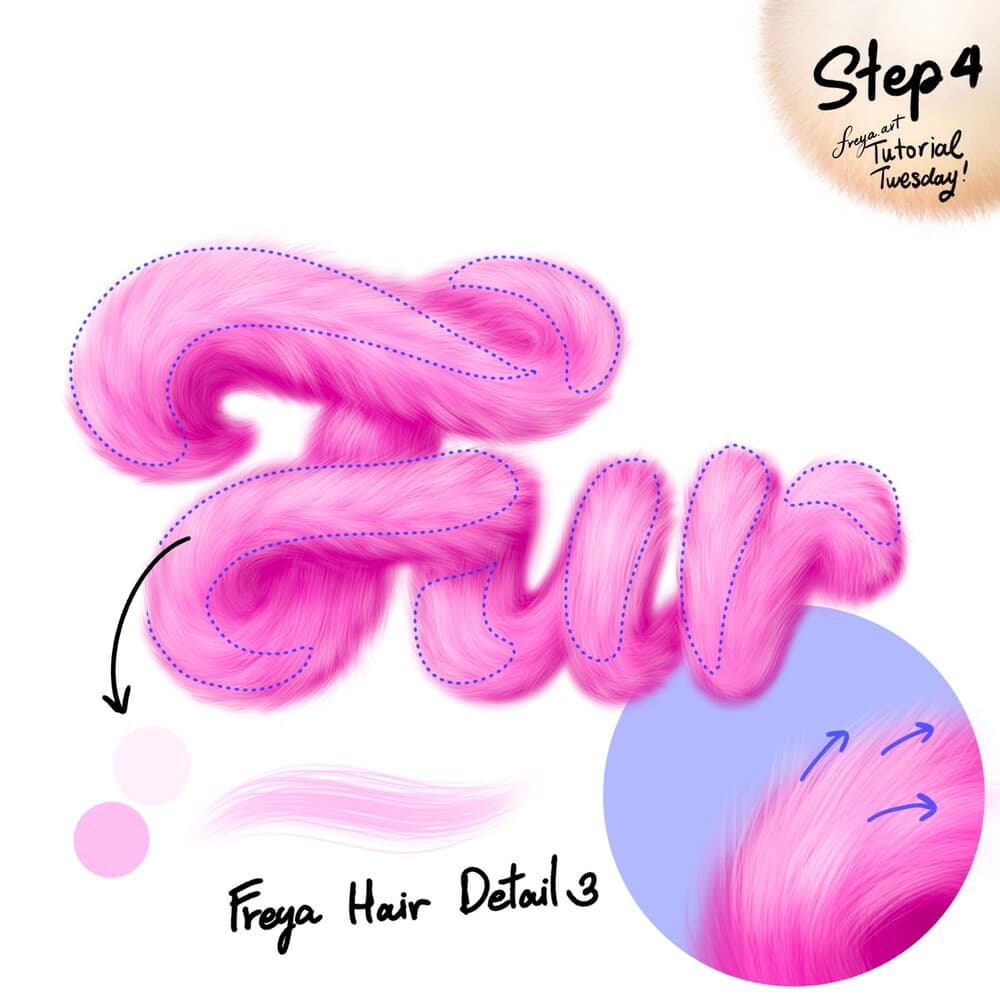
Step 4: Add another layer, and using a much lighter color, start adding highlights in areas that we want to pop out. we’ve marked these areas in this step.
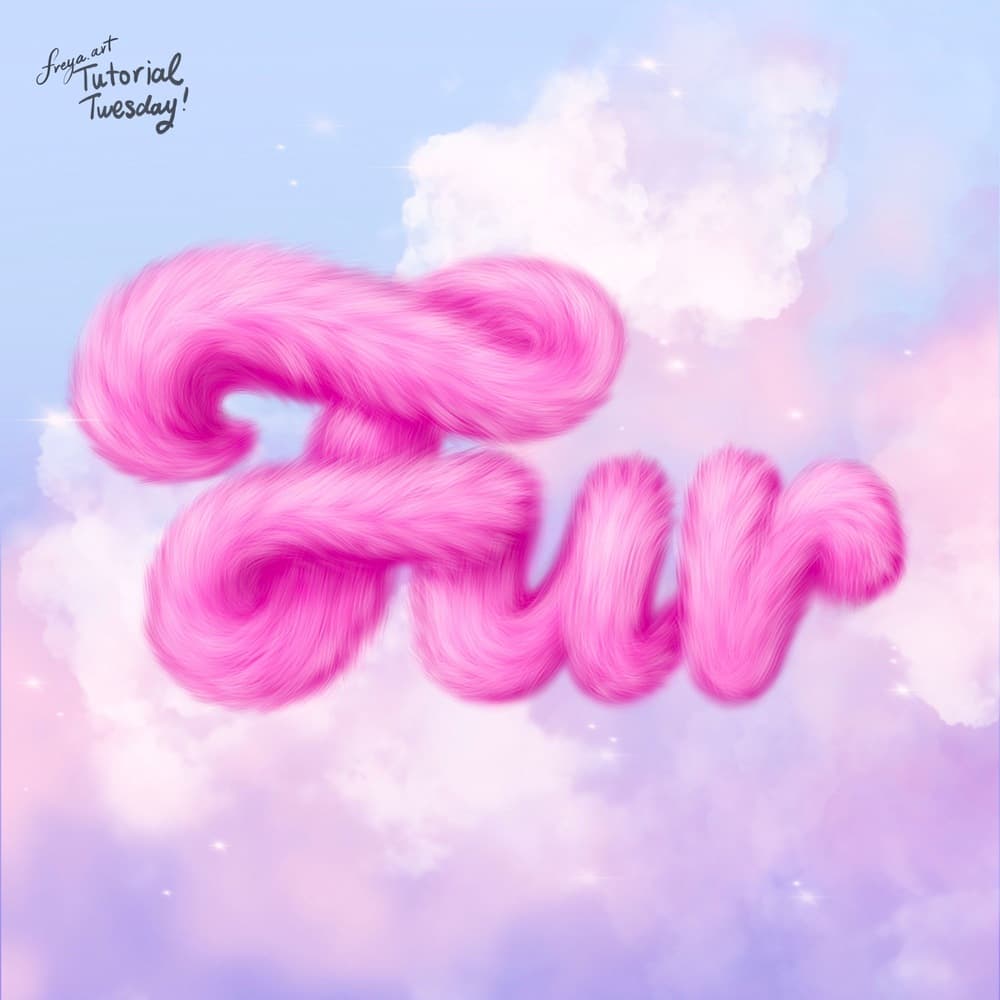
we’ve added some cute cloud background using the Twotap Tamar Cloud brush and smudge tool, but you can use any textured brush like the default Wet Acrylic or default Tamar brush to create this effect.
Share a word you care about, then try a second pass with a different fur color. More playful demos live on the Twotap blog.


