Blue Hawaiian Cocktail Tutorial (Better Marker)
Draw a Blue Hawaiian cocktail in Procreate with Better Marker brushes, free files, and a step-by-step Twotap video.
Download the free files
Procreate-ready, yours to keep
This free tutorial is a fun Better Marker study: glass, liquid, garnish, and clean graphic color in Procreate. Download the free files so your construction matches the demo.
Follow the video layer by layer. Want the marker pack? See the Better Marker Brush Set.
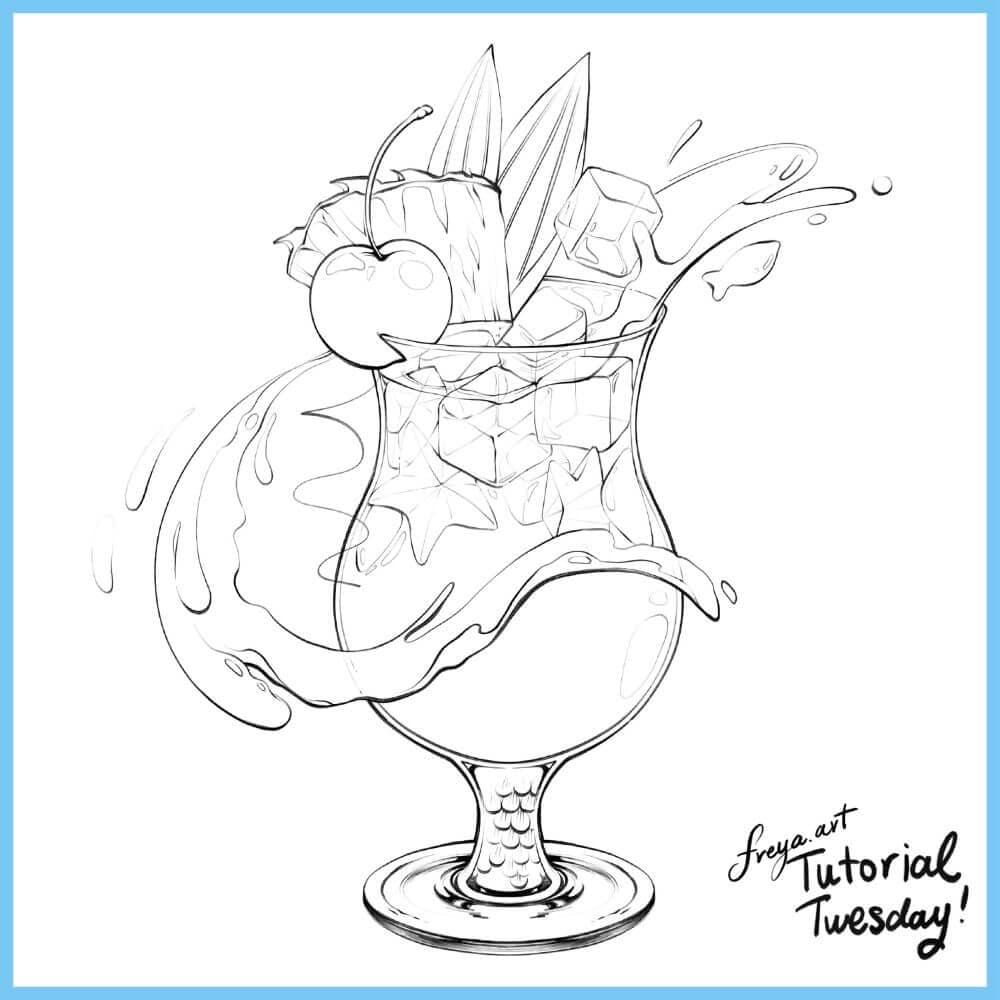
Let's begin by sketching our composition using the 6B or Peppermint Brush.
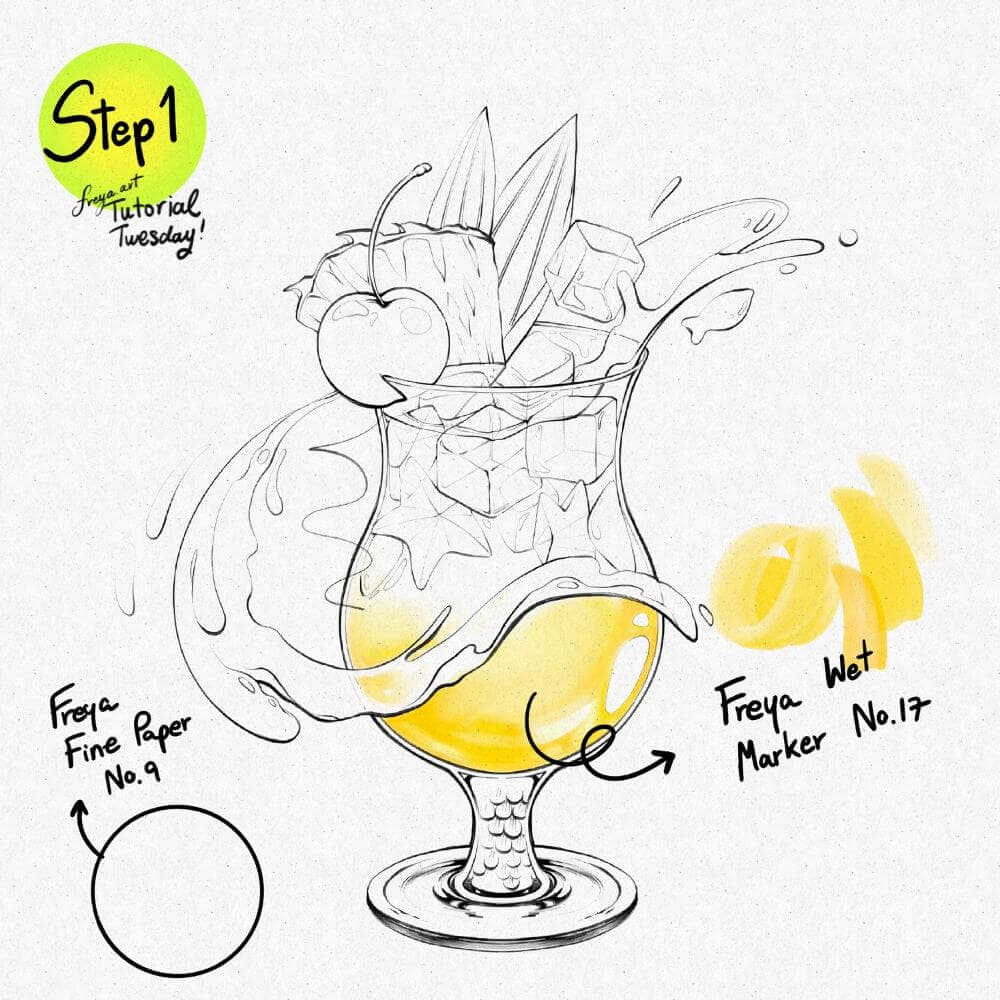
Step 1: Add a layer and swipe on the Twotap Fine Paper No. 9 Brush in a light grey color. Set this layer to Linear Burn (LB) and then lock this layer. All layers under this texture layer will then take on the same texture for an added realistic feel. Using Twotap Wet Marker No. 17, start coloring the base colors in separate layers. Remember to leave some areas white to act as highlight.
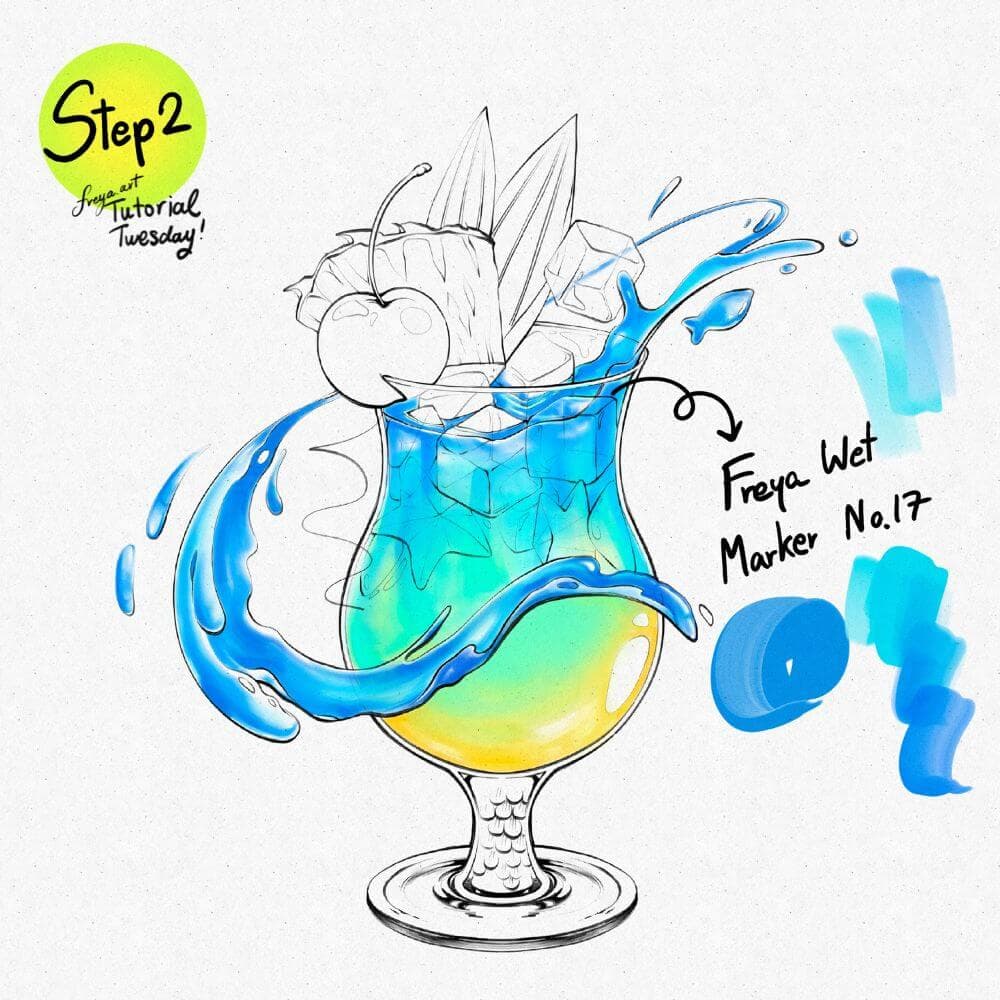
Step 2: Continue building the colors using the same brush. Add gradation between colors and blend it out.
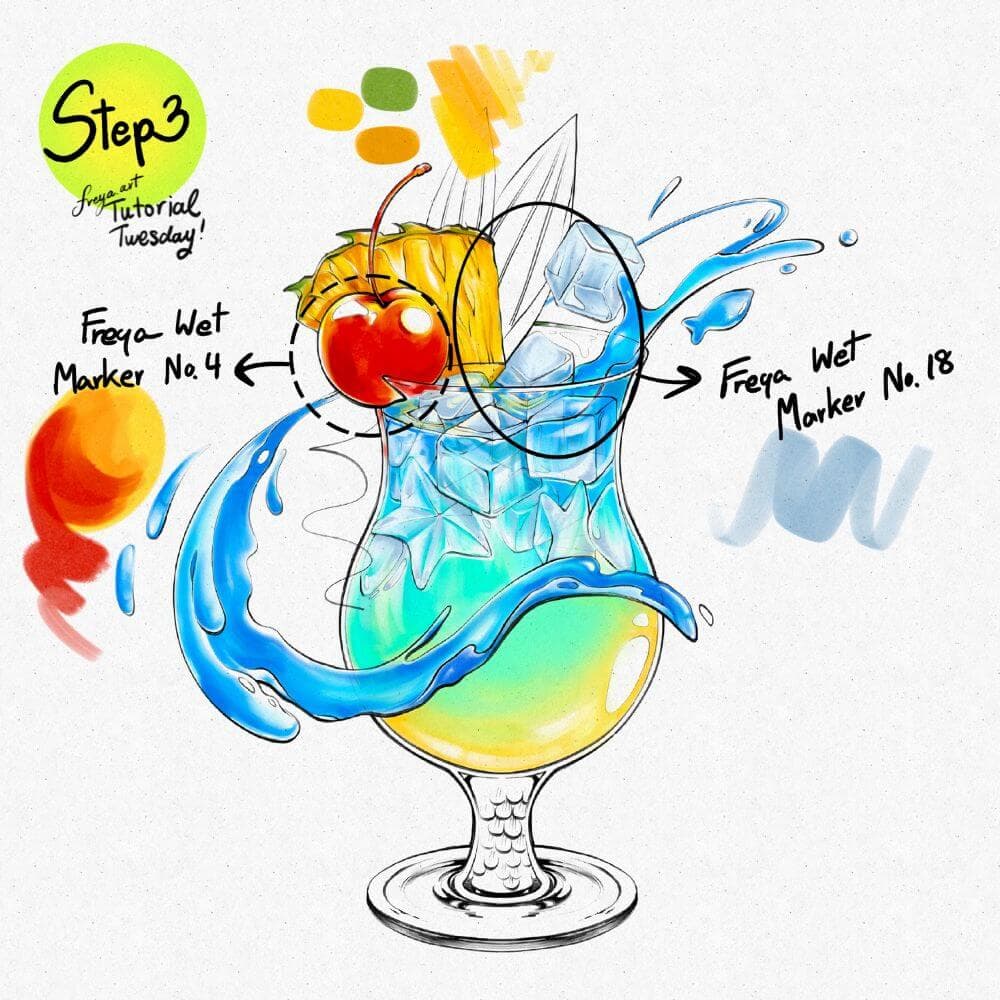
Step 3: On a different layers, color in the details for the fruits and ice cubes using Twotap Wet Marker No. 4 and Twotap Wet Marker No. 18
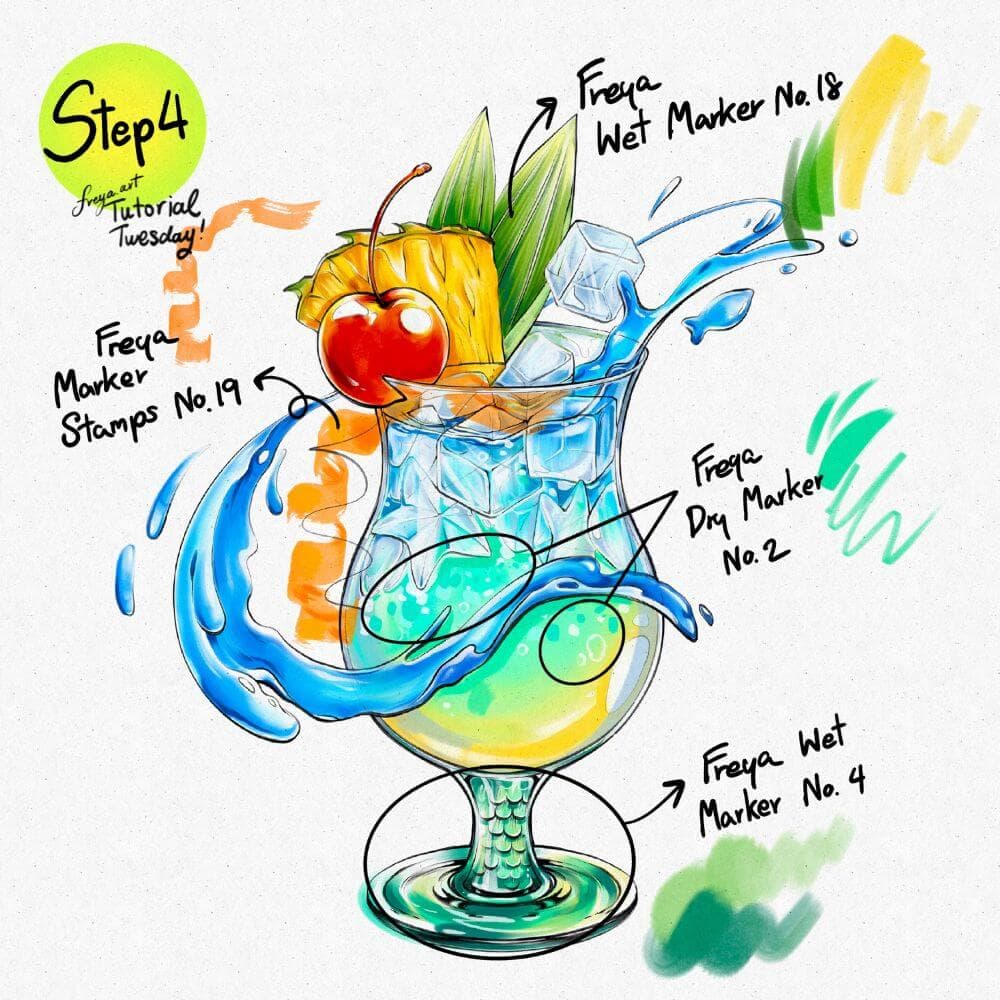
Step 4: Continue adding details with the Twotap Wet Markers, in particular, try to paint the leaves in an upward fading stroke to get that fading effect. For the base, don't forget to leave some areas white and add some tinge of yellow green to add reflected colors. Use Twotap Dry Marker No. 2 to bubbly texture and Twotap Marker Stamps No. 19 to add backdrop.
Your cocktail illustration is done. Try another drink study with a different palette, or explore more Twotap brush demos on the blog.


