Free Daisy Tutorial for Procreate
Paint a daisy in Procreate with free Twotap files. A short floral study that pairs with the Effortless Flower Brush Set.
Download the free files
Procreate-ready, yours to keep
Daisies are excellent Procreate practice: repeating petals, a textured center, and a composition you can finish in one sitting. This free tutorial includes downloadable files so you can paint along with confidence.
Follow the video, then adjust colors to make the piece yours. The workflow pairs well with the Effortless Flower Brush Set.
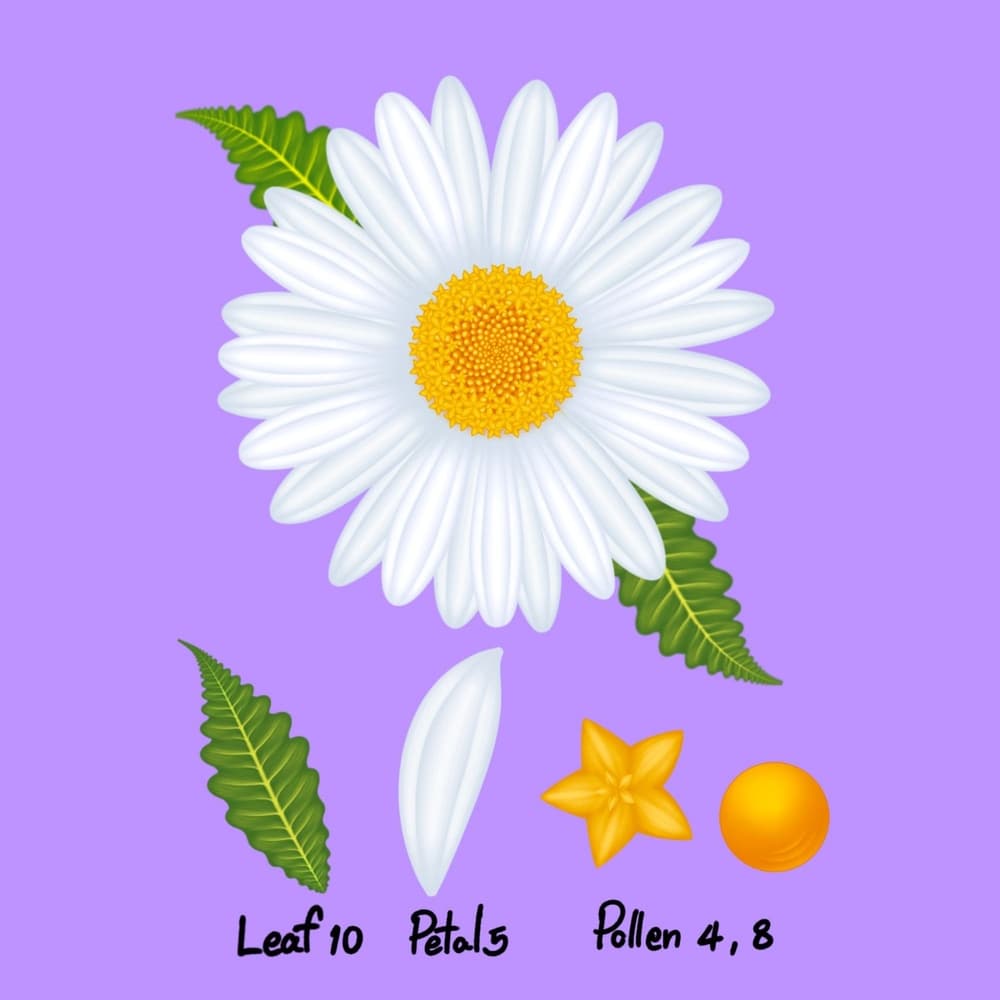
To recreate this flower, we are going to use five brushes from the Effortless Brush Set. Namely Leaf No. 10, Petal No. 5, Pollen No. 4 and 8. Make sure that your Dynamic Scaling is turned on when you're using this brush set, you can find this under Actions > Preferences.
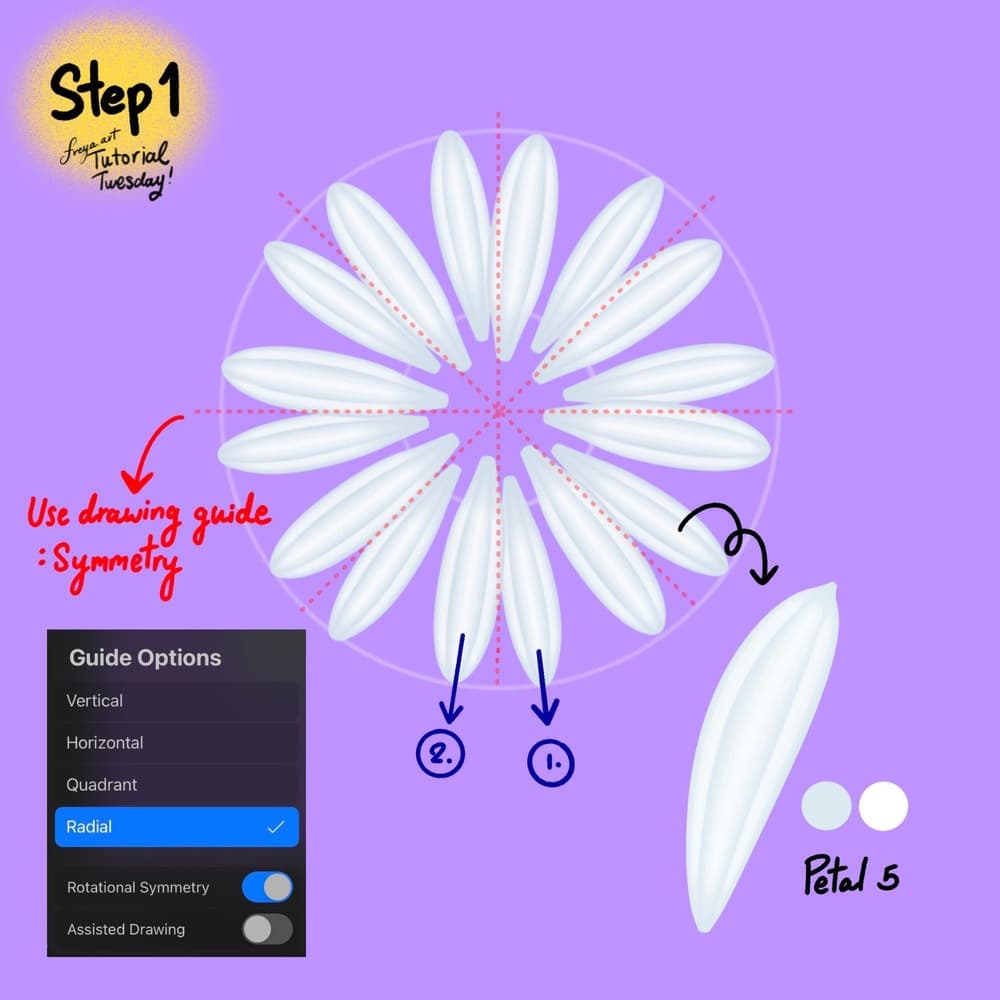
Step 1: Create a 3000 x 3000 pixel-canvas at 300 DPI. Create a layer. Then go to Actions > Canvas > and turn on Drawing Guide. Tap on Edit Drawing Guide > Tap on Symmetry > Options> and choose Radial and Rotational Symmetry. Tap Done.
Go back to your layer and turn on Drawing Assist. Choose the color duo for the petals. After setting the primary and secondary colors for these dual brushes, remember to tap the primary color again, so that Procreate uses that as the active color.
Choose Petal No. 5 brush, then start painting the petals towards the center, tapering off at the end. One stroke and you’ll have 8 petals. Draw another set so that you have 16 petals for this layer.
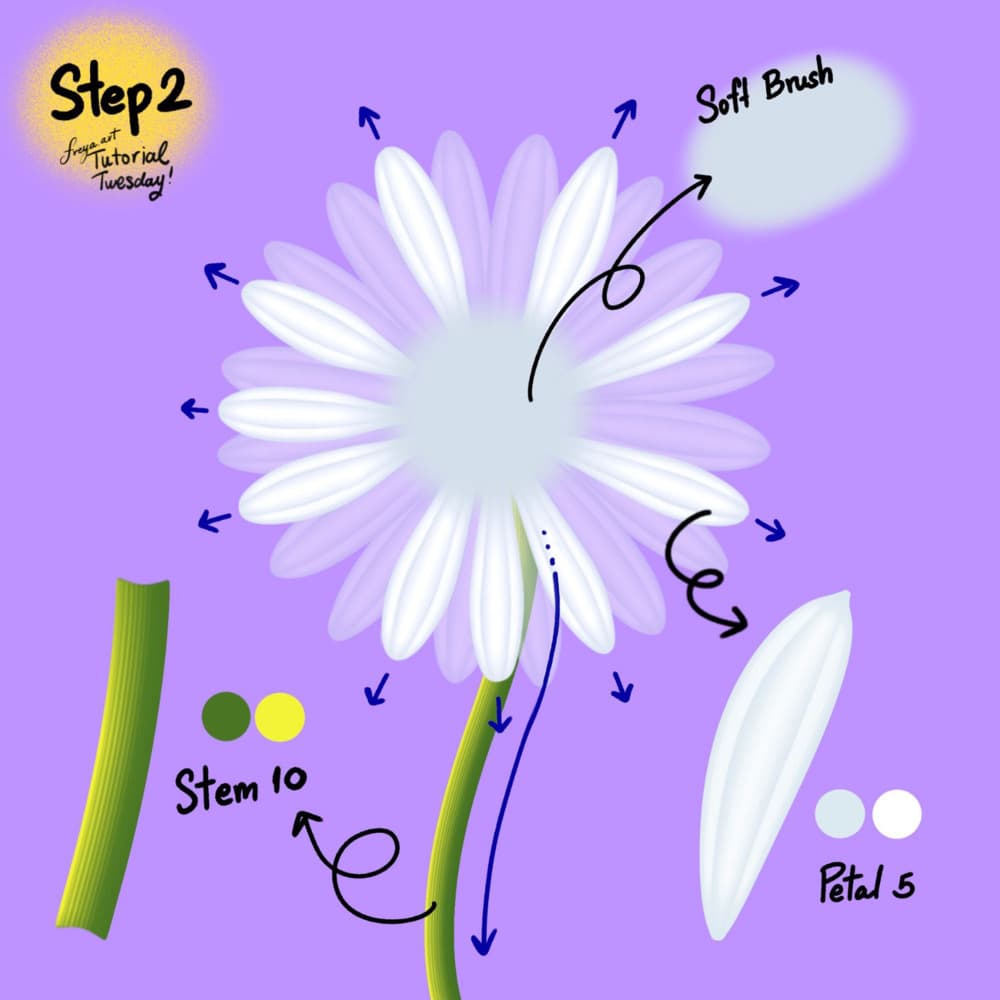
Step 2: Add another layer but this time don’t turn on the drawing assist. Use the green color duo and draw the stem using the Stem No. 10 brush. Then add another layer. Set the color duo back to the petal color again, and this time draw the petals without Drawing Assist. This will help make it look more natural. This layer should be on top of the stem, so the top of the stem is covered.
Then finally, add a light blue center using the Soft Brush from Procreate’s default Airbrushing group.
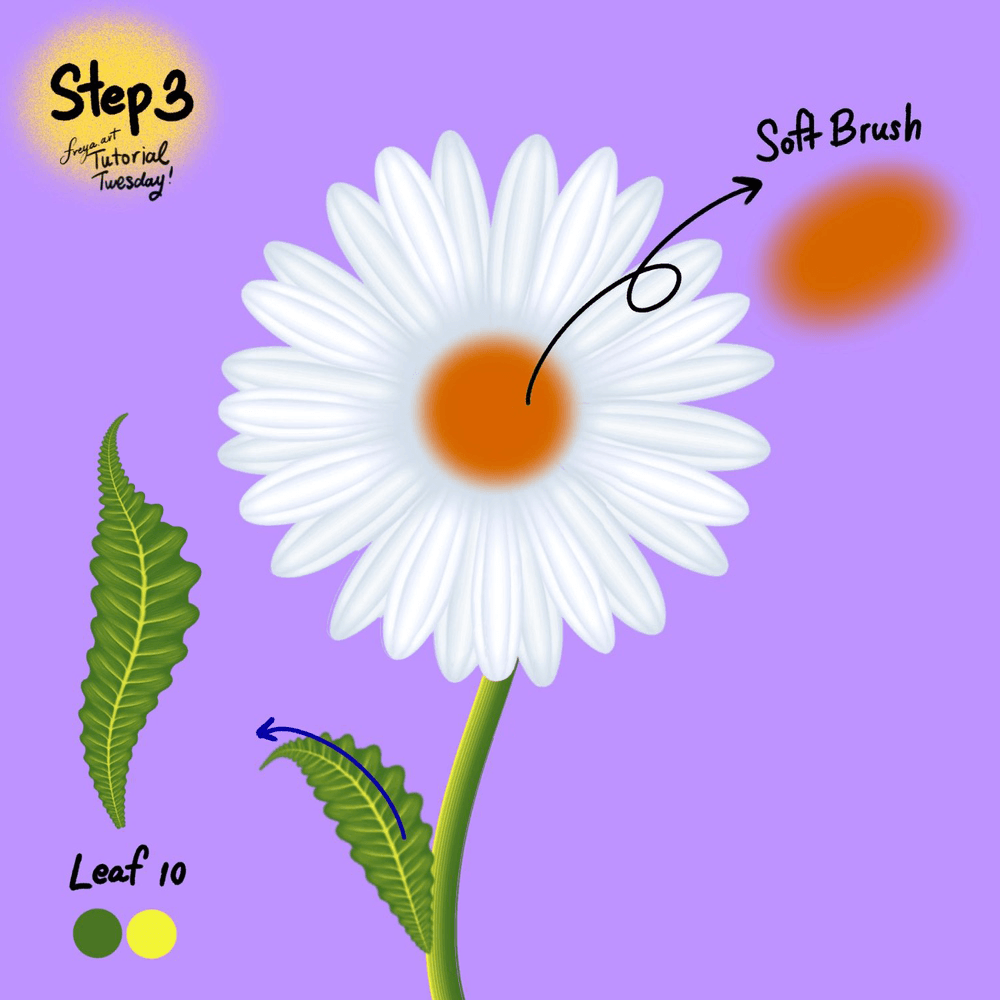
Step 3: Add another layer. Set the color to orange and using the Soft Brush again, add a bit on top of the blue center. Add another layer for the leaf. Set the color duo and using Leaf No. 10 brush, draw the leaf moving outward. Work with minimal pressure at first, add pressure to expand the leaf width then ease up on the pressure to taper off.
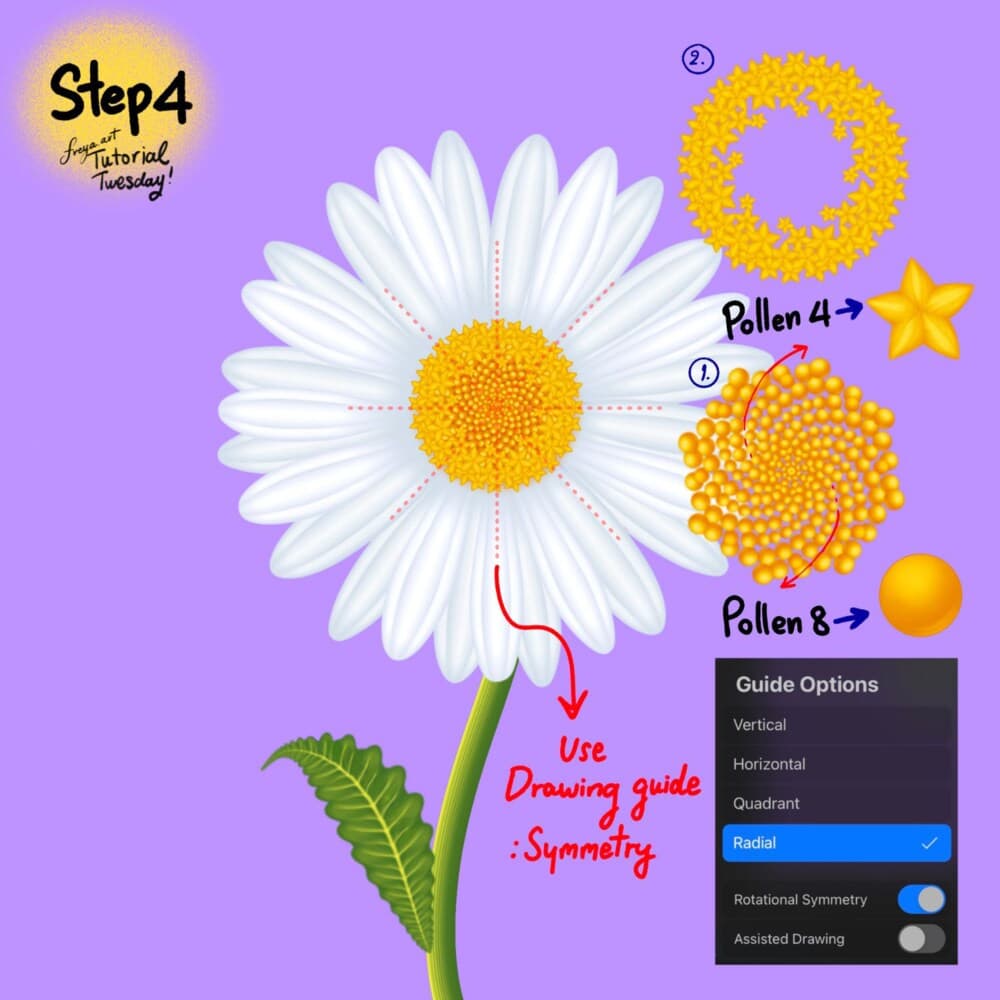
Step 4: Add another layer for the pollen. Turn on symmetry and rotational symmetry again. Go to your layer and enable Drawing Assist. Set the color duo and use Pollen No. 8 brush first. Tap to create the circles moving in a curved direction, from the center outwards. Each circle should be slightly bigger than the last.
Add another layer, and turn on symmetry and rotational symmetry again. Go to your layer and enable Drawing Assist. Then using Pollen No. 4 draw around the sides covering about halfway of the pollen.
Export your daisy and try a small bouquet variation next. More free flower lessons live on the Twotap blog.
Next up: more flowers with the Effortless Flower Brush Set, or browse free demos on the Twotap blog.