Procreate Tips That Save Real Time
Gesture shortcuts, import habits, and brush organization tips you can use on the next canvas you open.

A few Procreate habits remove a surprising amount of friction: cleaner layers, faster gestures, and less time hunting for tools. This list focuses on tips you can use on the next piece you open.
Skim for one tip you do not already use, then apply it before you add more techniques.
Tip #1: Drag and drop to import multiple files
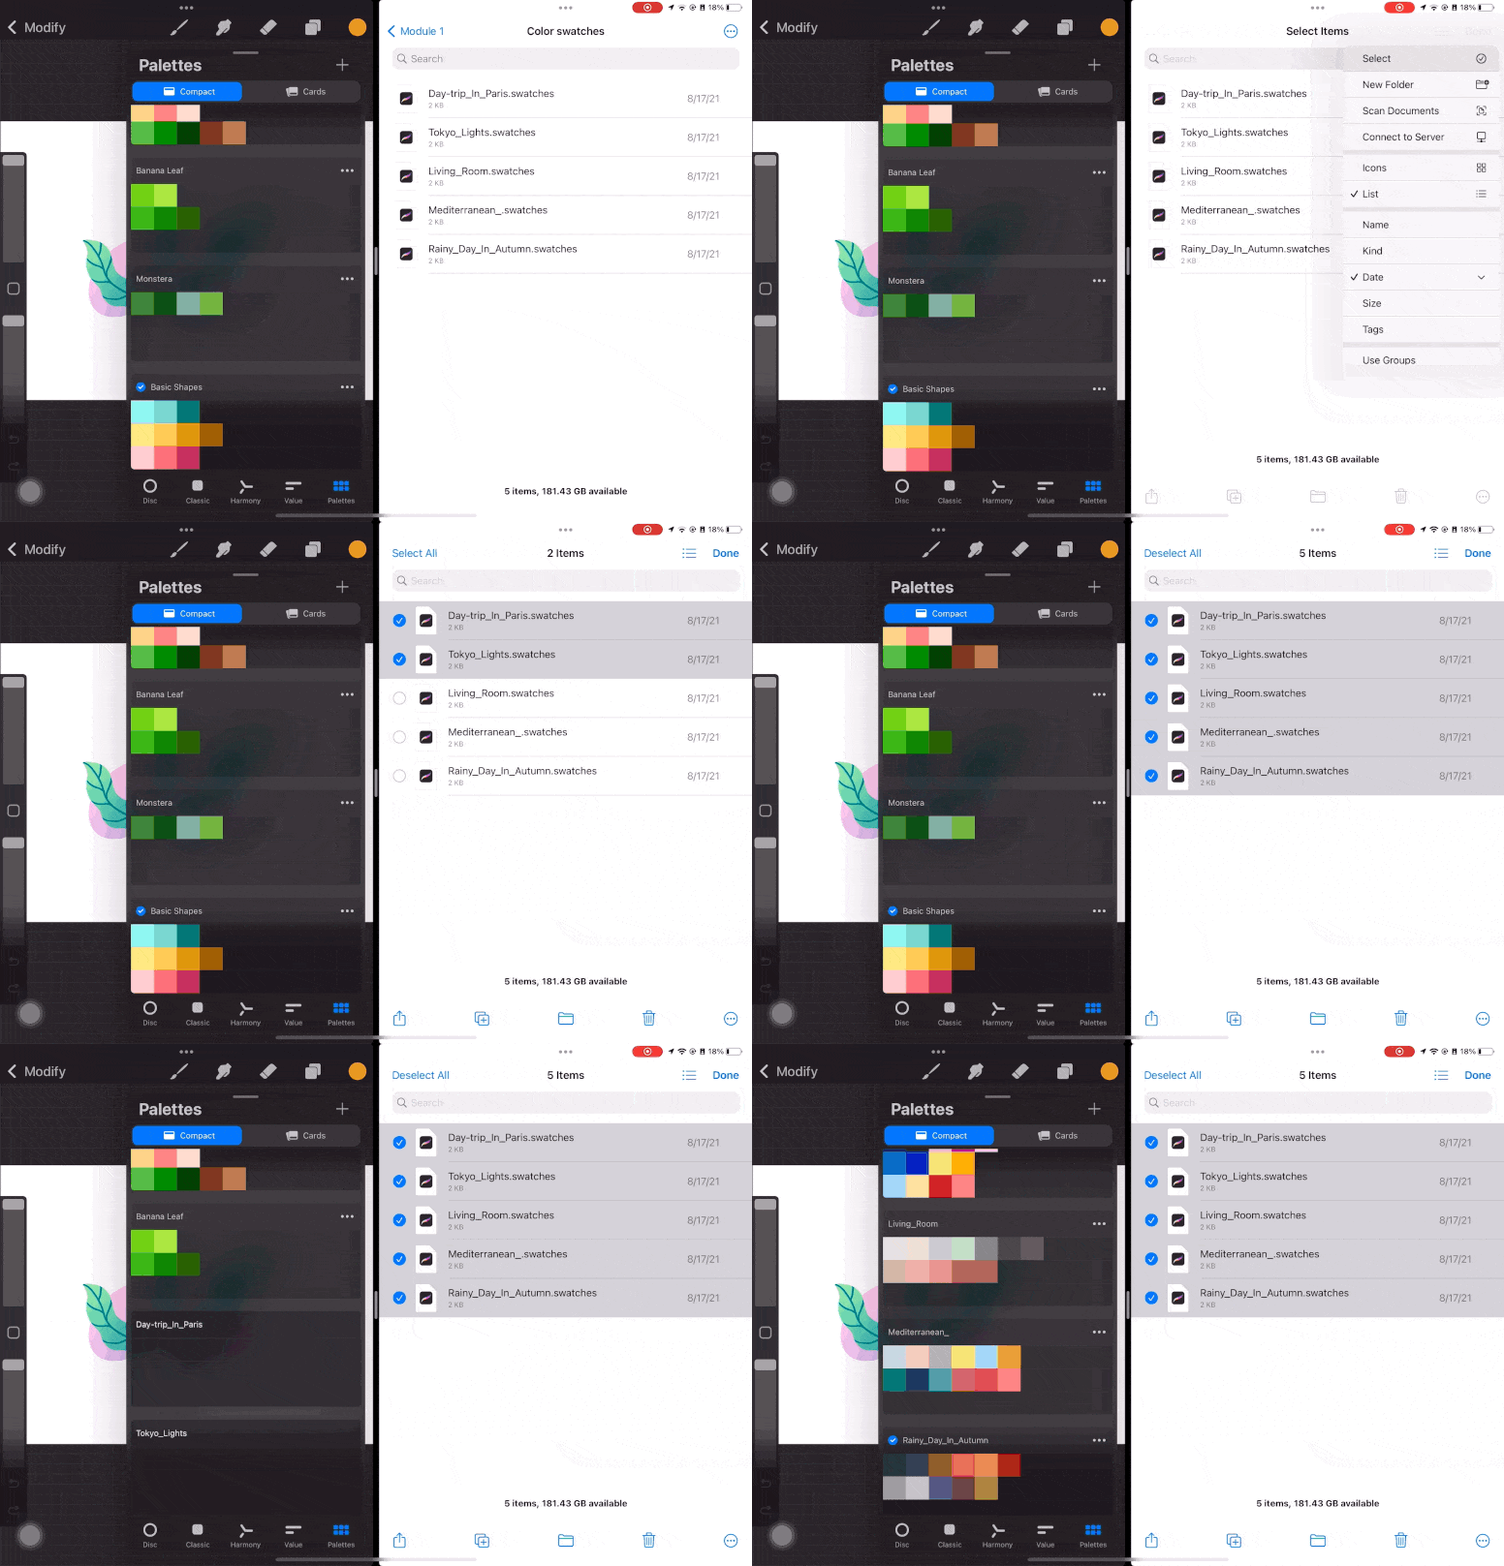
In Procreate, you can import different files such as images, Photoshop files, brushes, and even swatches. But did you know that you can actually import multiple files at once? You can also do this by using the iPad’s Split View feature.
Simply open Procreate and your Files App side by side in Split View. Select the files you want to import then drag and drop them into Procreate.
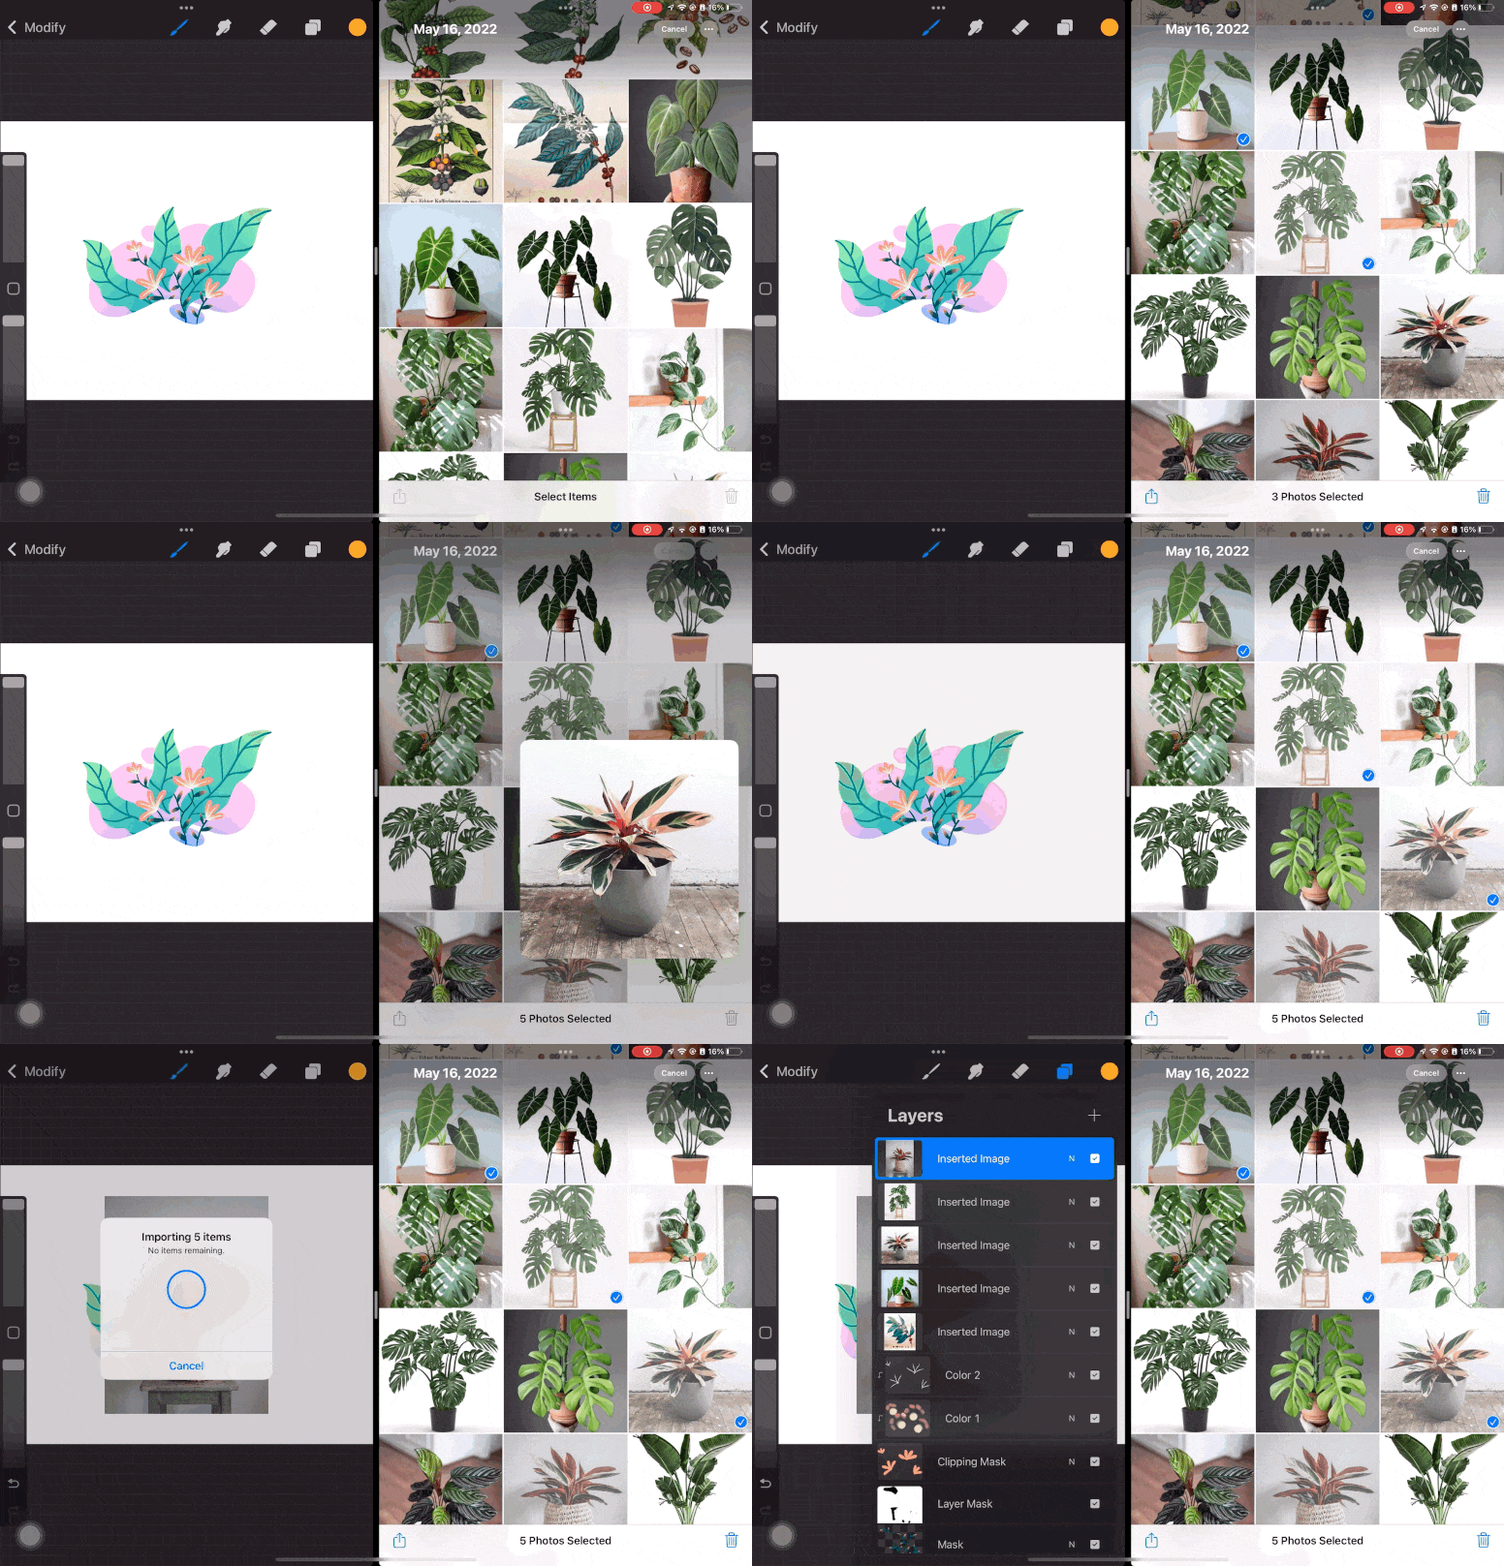
You can also do this to insert multiple pictures into your work. Just open Procreate and the Photos app in Split View and do the same thing.
Tip #2: Use Alpha Lock to easily change your work’s color
Alpha Lock is one of the masks available in Procreate and you can actually use it to easily change a layer’s color. This can be useful especially if there are multiple objects in that layer and you want to quickly change all of their color.
To do this, select the layer and turn on Alpha Lock.
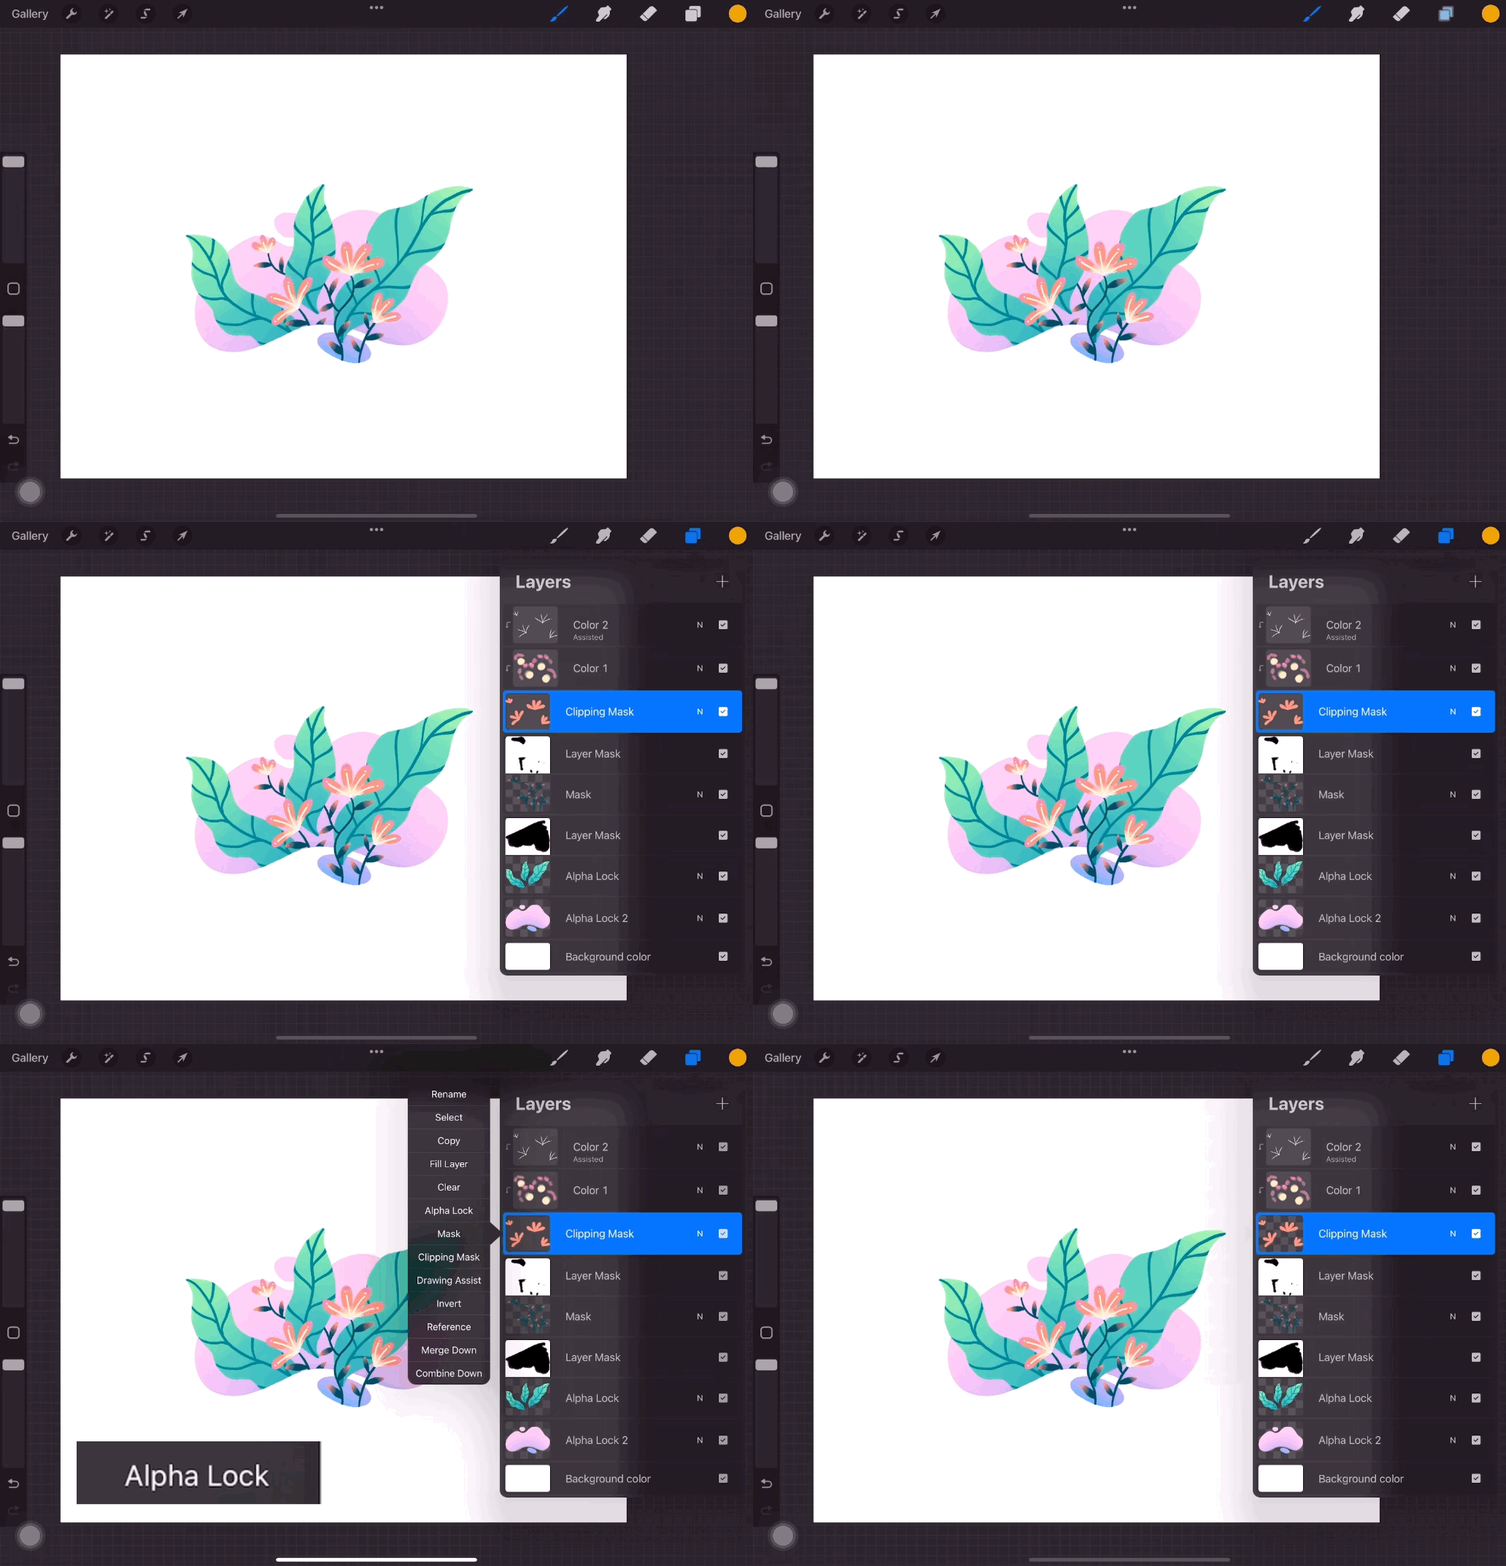
Choose the color you want to change it to then tap on the layer again and select ‘Fill color’.
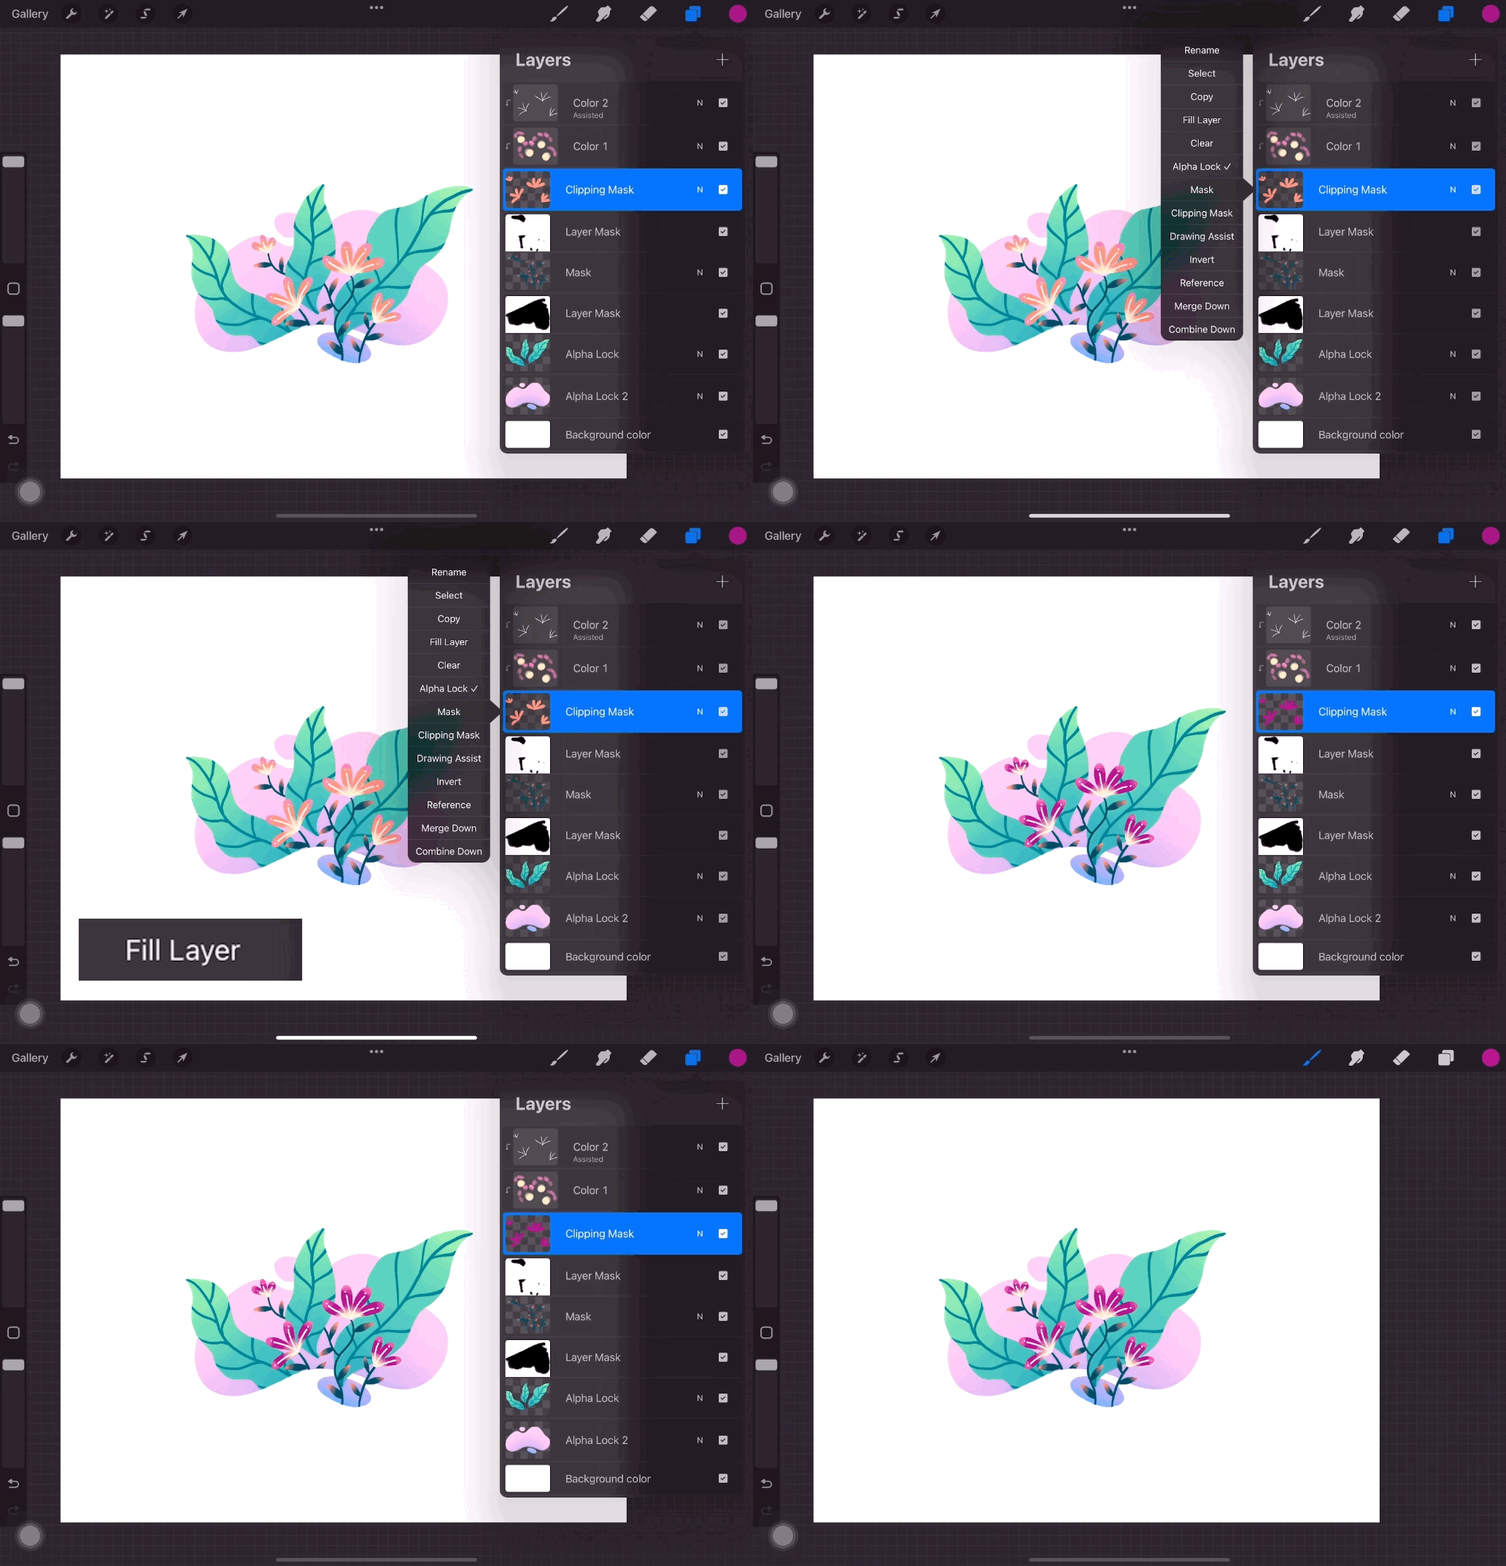
Now you can easily change the colors of your work, even if it’s very fine details.
Tip # 3: Customize your preferences
When you open the Actions Menu, it’s the wrench icon at the top of your workspace, tap on ‘Prefs’.
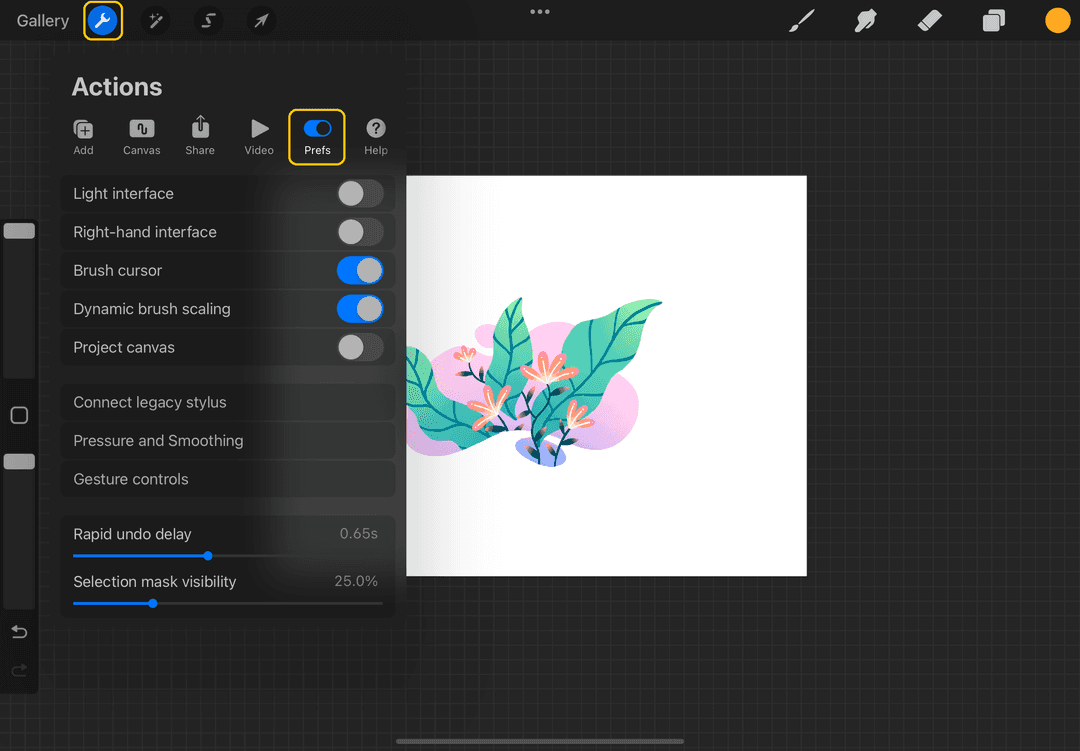
Here you’ll see that there are a lot of options for you to customize your workspace, including the interface color. You can also change the position of the brush size and opacity slider, depending on which makes more sense to you.
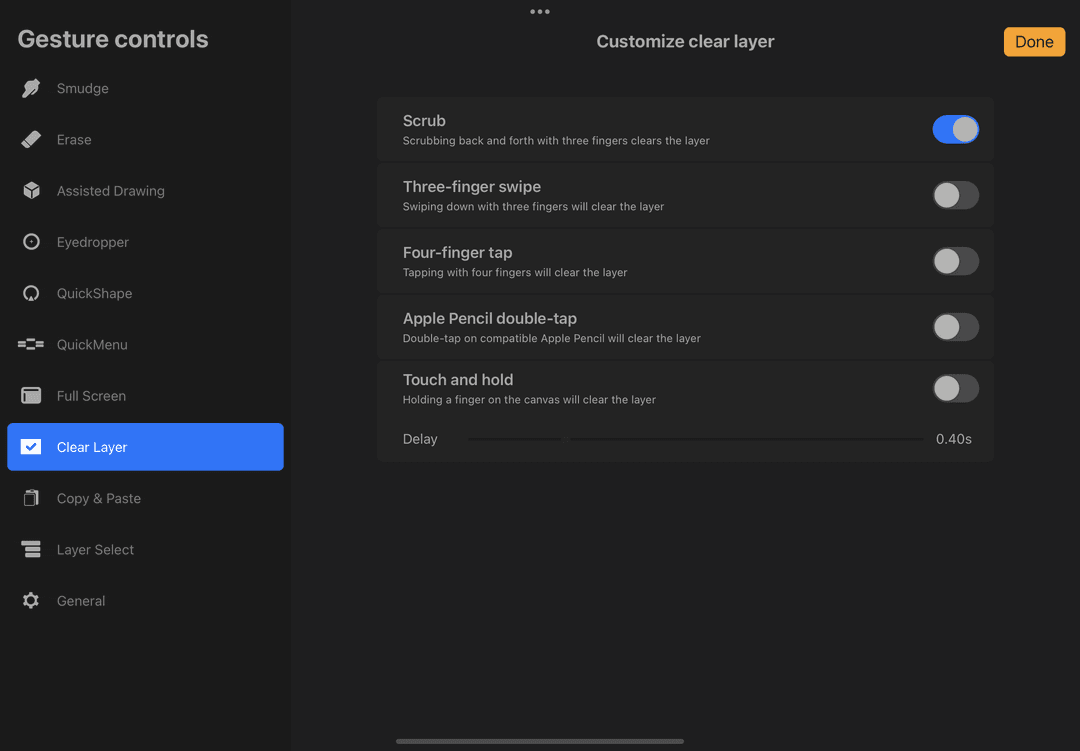
You can also customize the gestures. Just tap on ‘Gesture controls’ to see what options you can change. You can modify which gestures activate different tools based on what you think works best for you.
Tip #4: Turn on Drawing Assist to draw straight lines
When you draw a line and hold, Procreate automatically snaps that line into a straight line. But if you’re drawing multiple straight lines, turning on the Drawing Assist feature would be easier.
Go to the Actions Menu, choose ‘Canvas’, and turn on ‘Drawing Guide’.
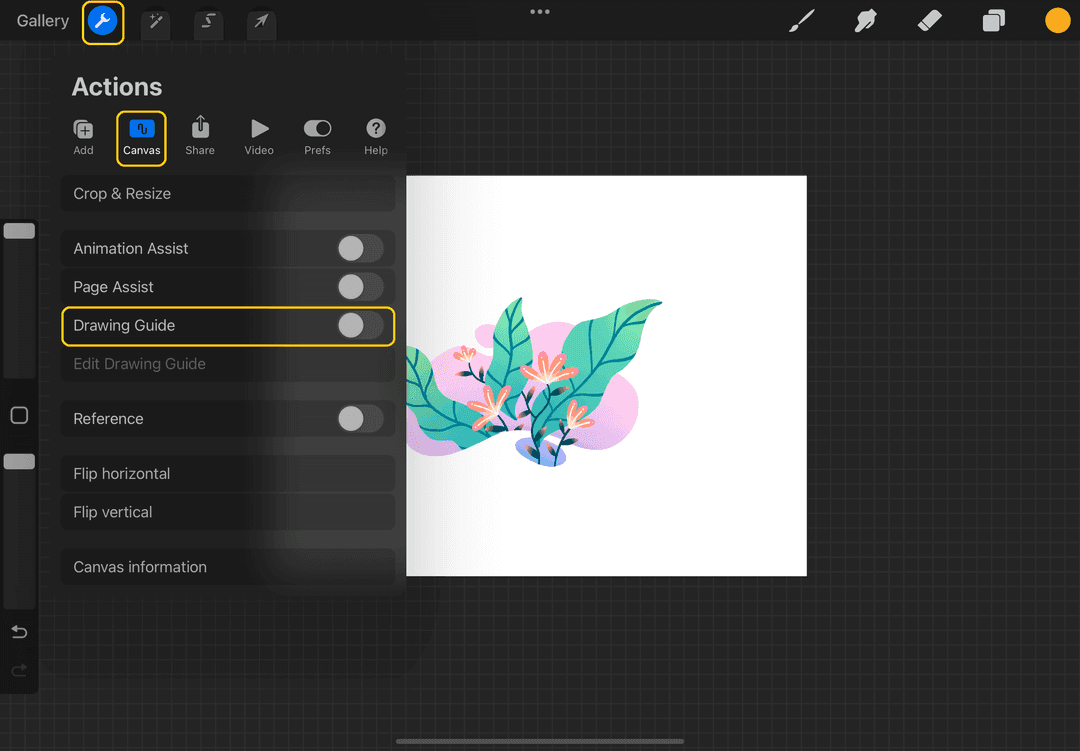
Make sure you’re using the ‘2D Grid’ guide, which you can change by tapping on ‘Edit Drawing Guide’.
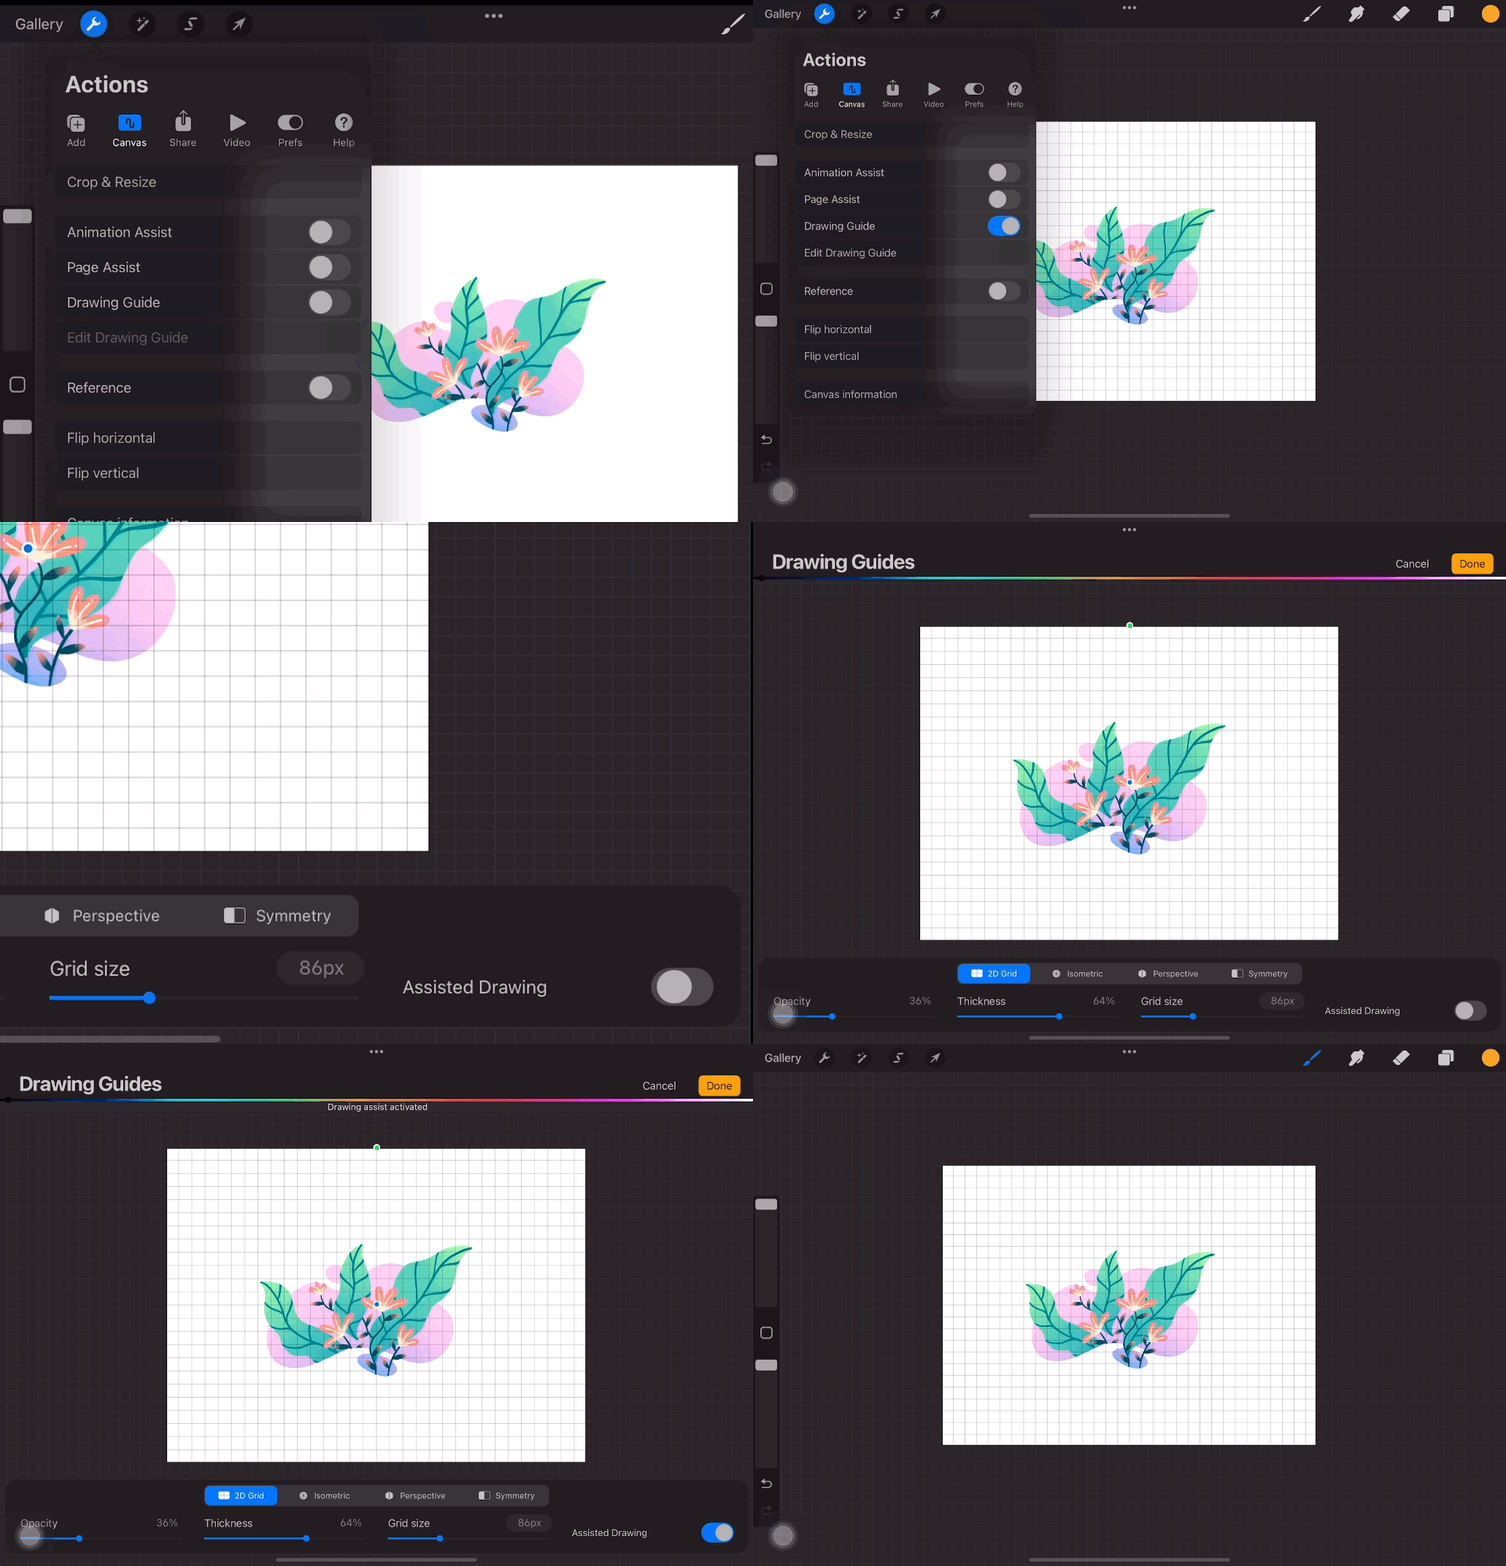
You can turn on ‘Assisted Drawing’ on this page, or you can tap on the layer and tap on ‘Drawing Assist’.
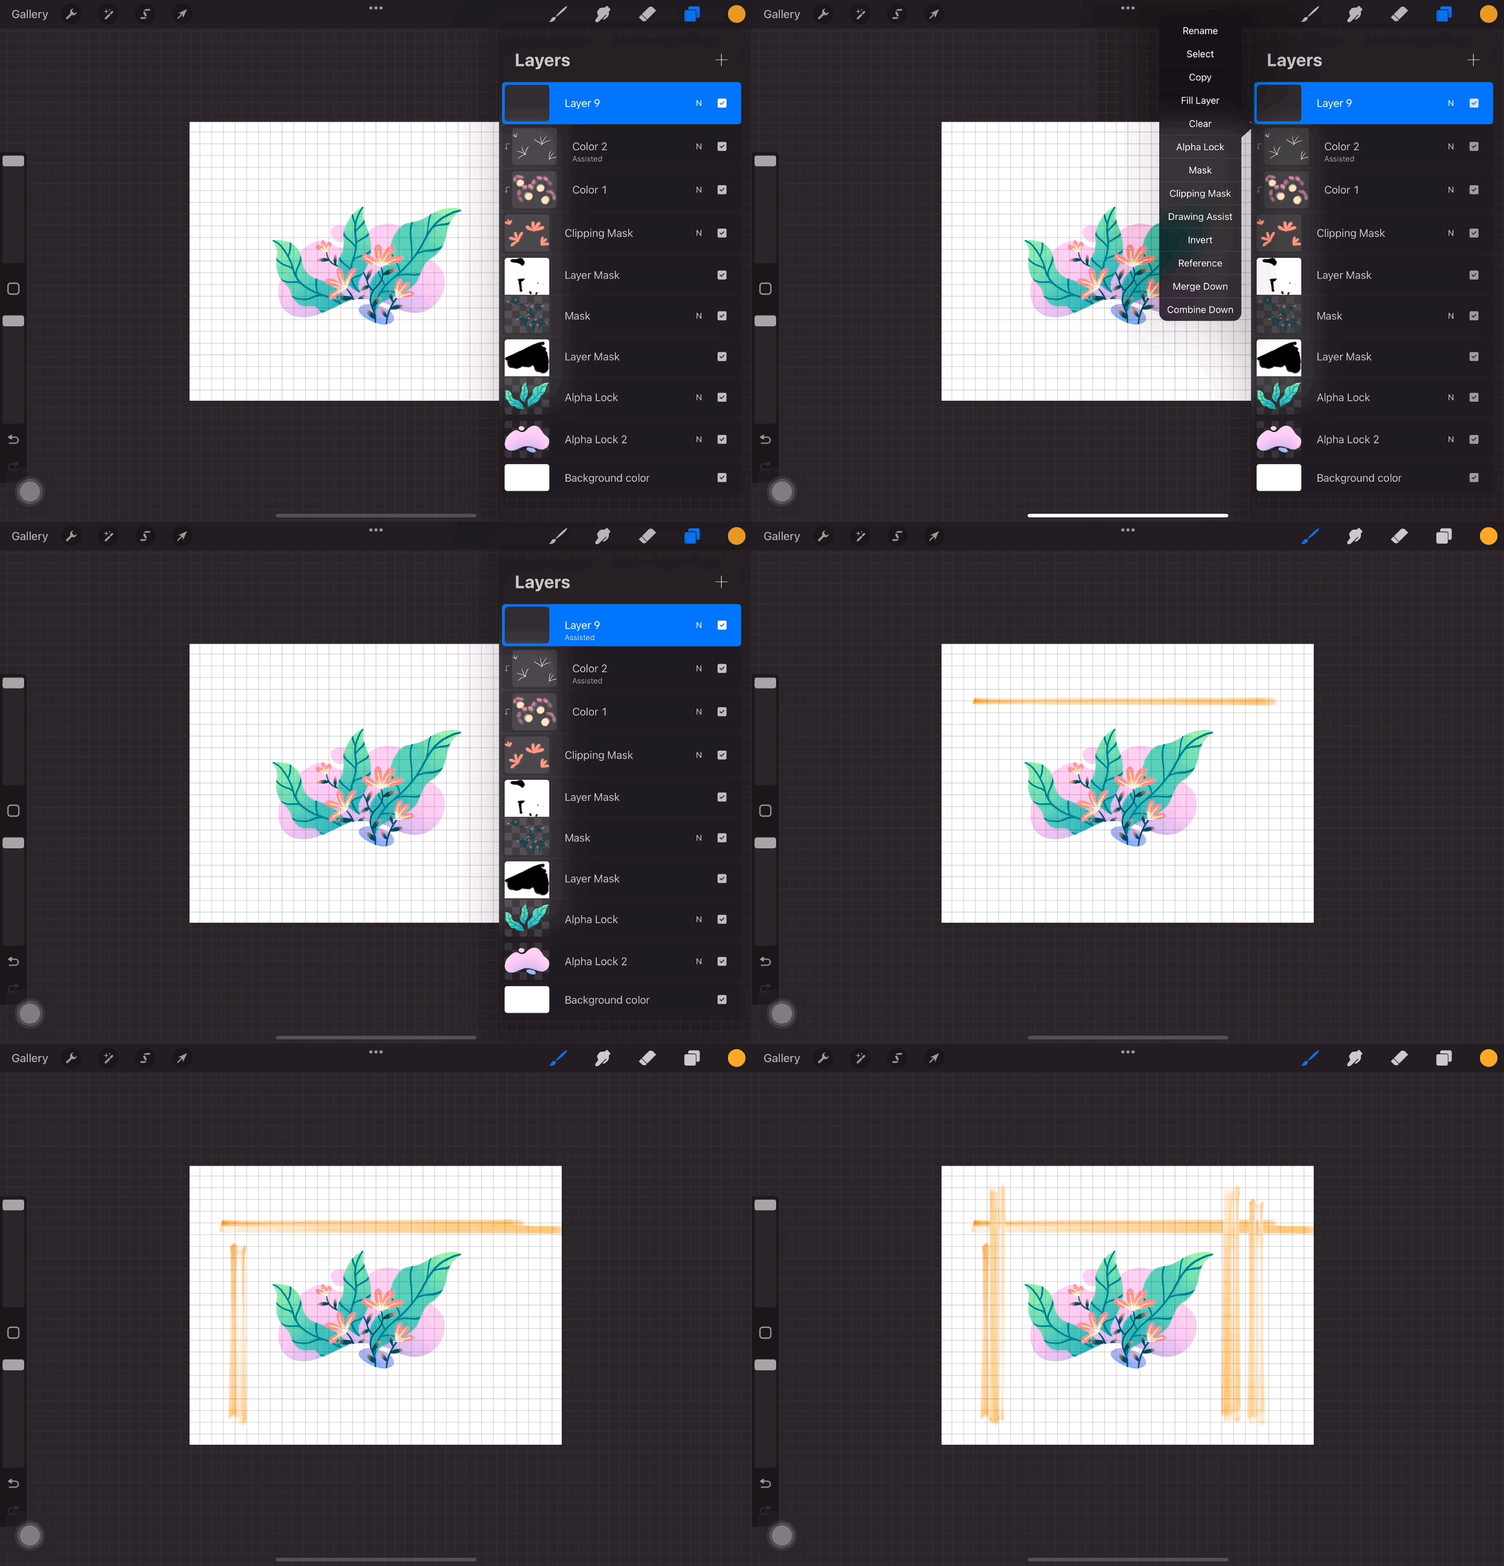
Now all the lines you’ll draw can only be perfectly straight horizontal and vertical lines.
To turn off this feature, simply uncheck the ‘Drawing Assist’ in your layer’s options.
Tip #5: Make your own custom brush set
Procreate already provides a lot of default brushes already included in the app when you purchase. But if you’re like me who uses a lot of brushes from Procreate and from other artists, it gets a little time-consuming to look for the brushes sometimes.
Many of us collect several Twotap brush sets, and from those brushes, you’ll have favorites you reach for often. Since Twotap has a lot of brush sets, sometimes it’s inefficient to always scroll through the brushes to look for what you use.
Instead of doing this every time, create your own brush set and add your most-used brushes there.
To make your own, simply open your Brush Library by tapping on the brush icon, then scroll through the top of the list until a blue ‘+’ sign appears. Tap on that to add a new brush set, Name it as ‘Favorites’.
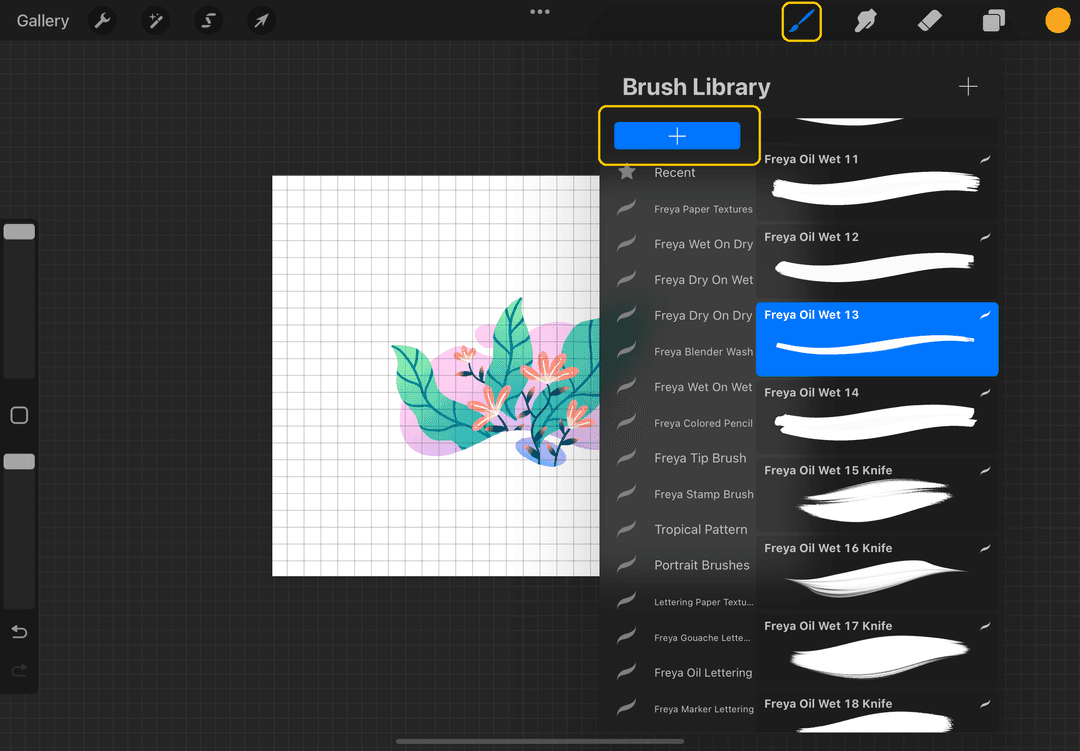
Then drag and drop your favorite brushes into this set. But before you do this, make sure to duplicate the brush first so that it has 2 copies - one on its original set and one on my Favorites set.
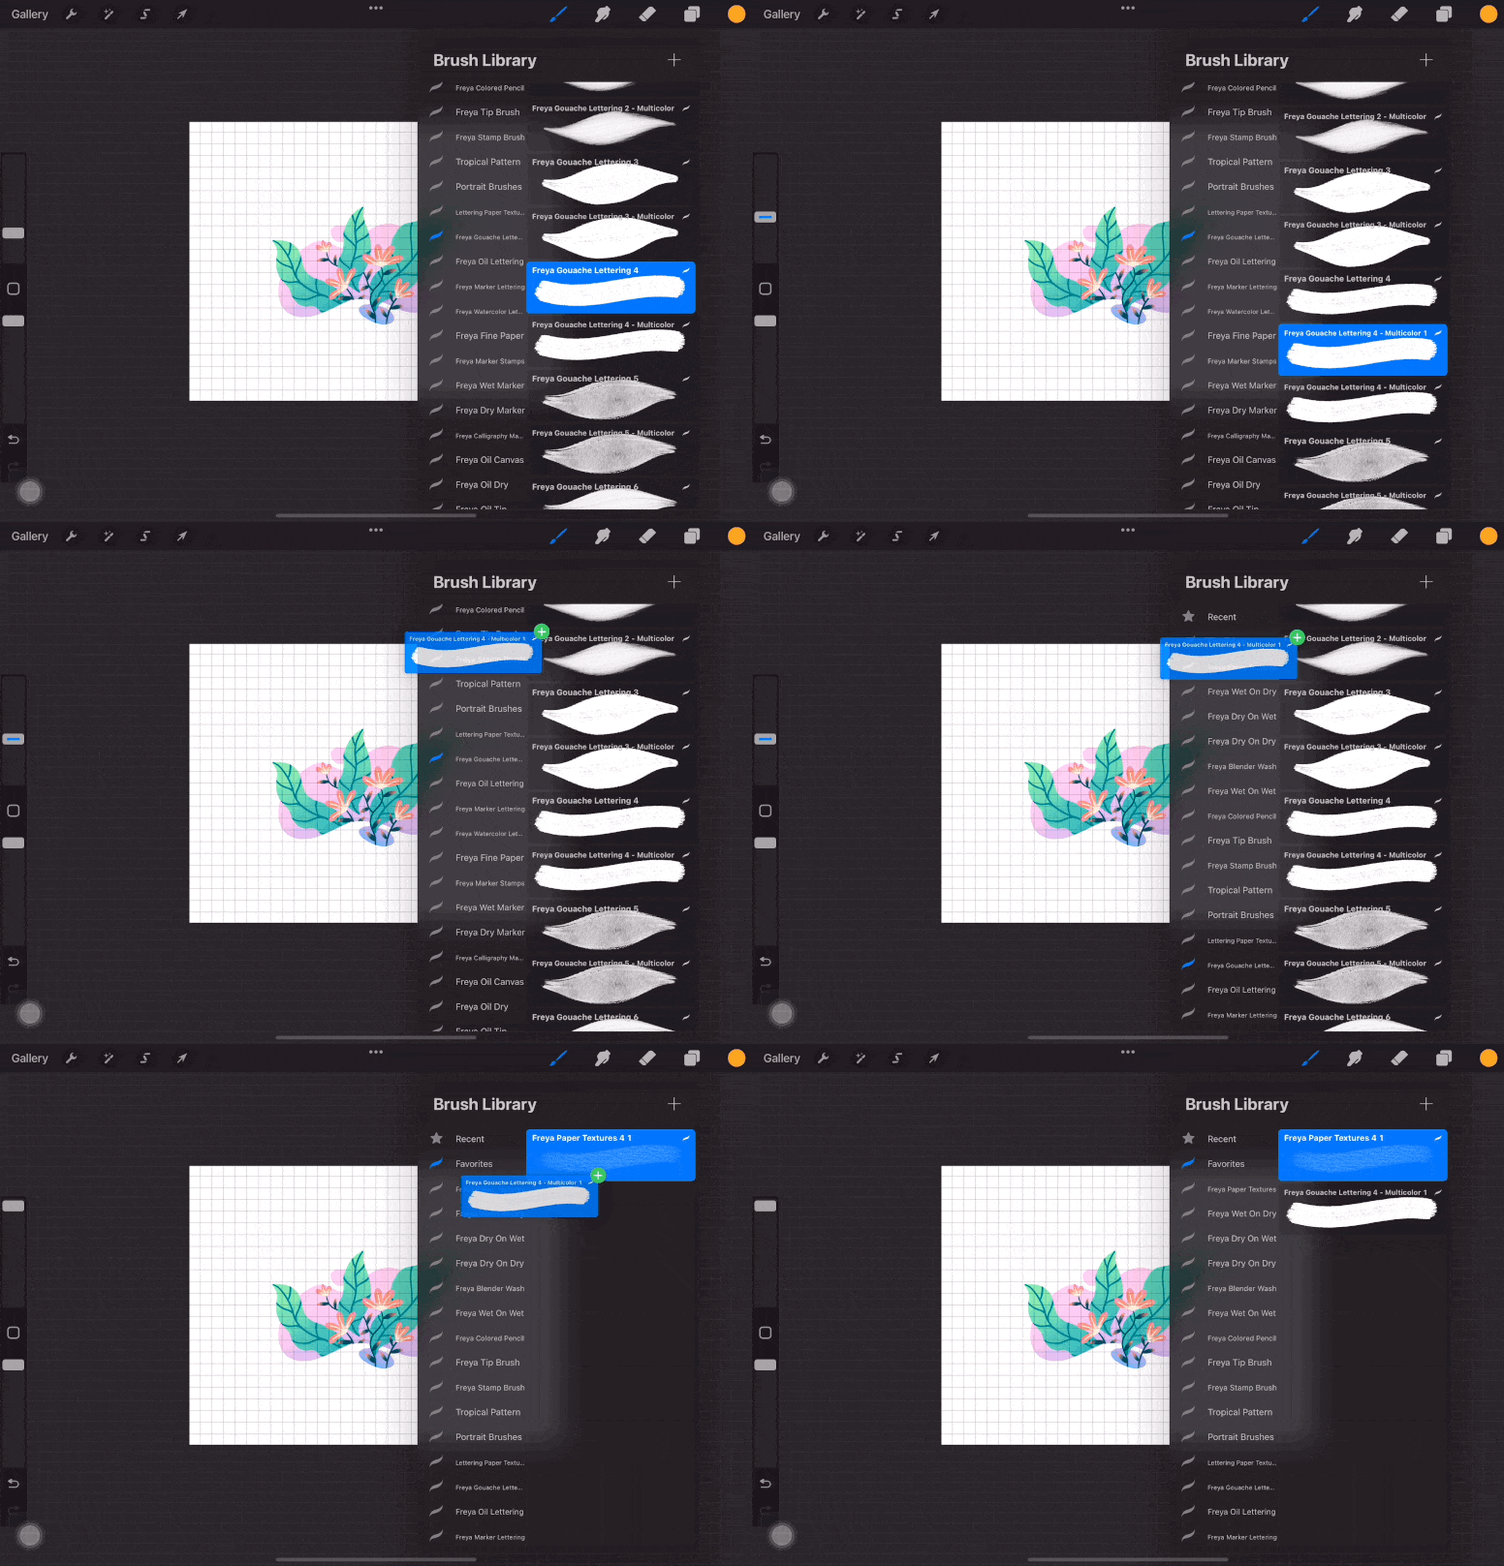
You can choose to name your brush set whatever you like, and you can even create multiple sets for different use. You can make one for your favorite line art brushes, or maybe your favorite brushes to color with. Whatever makes it easier for you!
There are a lot of other tricks you can do in Procreate so that creating your work becomes a breeze! Aside from the tips you can get from other users, you’ll also discover a lot of techniques yourself once you spend enough time on the app.
As usual, practice is the key! Enjoy working on your art pieces and you’ll be sure to master this in no time.
If you’re looking to speed up your progress without using up so much time, you can look into tutorials by experts who’ve already gone through the process themselves. Twotap has some free Procreate tutorials you can look into for practice.
Bookmark this page and add one tip per week so the habits stick. When you want deeper training, browse the Twotap course library.
Put one tip into your next free tutorial on the blog, then keep growing with a structured course from the catalog.


